Honours of War Scenario - The Clash at Kutzdorf
This was the first game against a human opponent for both Dave and myself with Honours of War. As always when one learns a set of rules playing solo and then start playing an opponent a whole new set of challenges and different interpretations of the rules emerge. This game was to be no different.
However, both of us agree that Keith Flint has made an outstanding job with these rules. They play very well and give one the real flavour of the Seven Years War. If you are not familiar with them I recommend buying a copy and giving them a go. They are available through Osprey and are Book 11 of their "Osprey Wargames" range.
The Scenario
The scenario is taken straight from the book. The forces are relatively small.
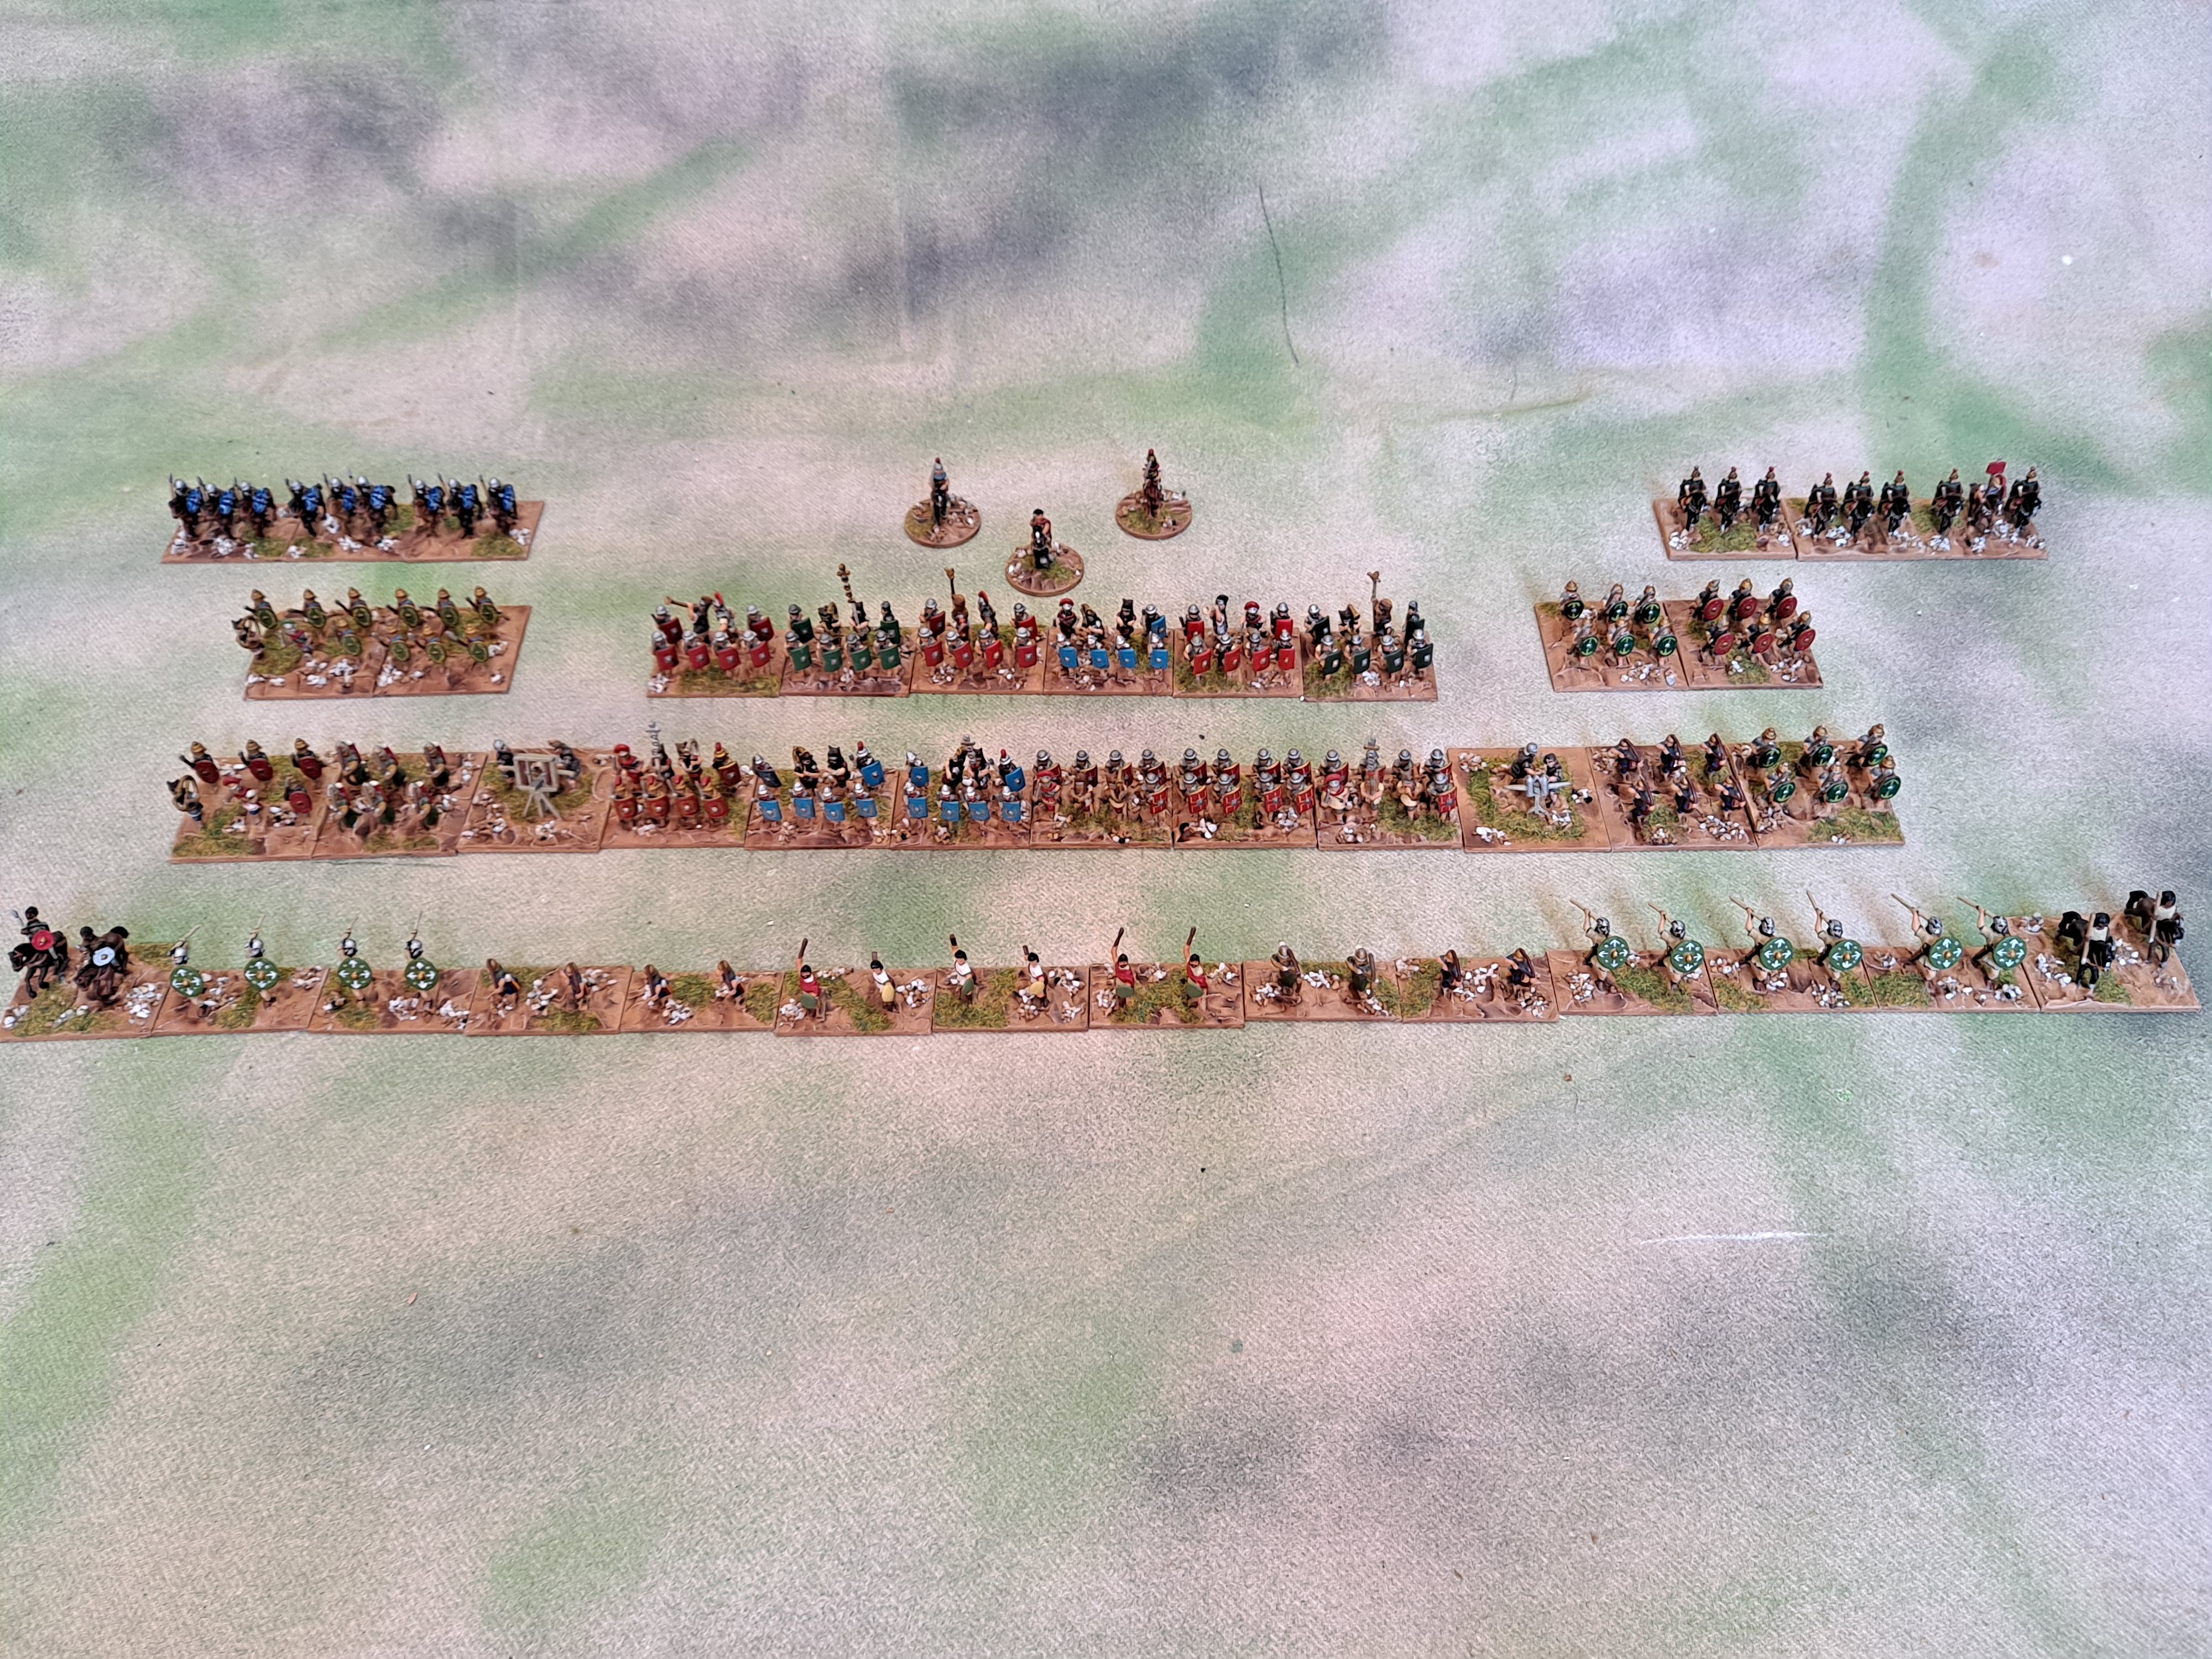
In this case I laid out the Prussians with two infantry Brigades with 3 battalions each and a medium battery. and a Cavalry Brigade of a regiment of Dragoons and a regiment of Hussars. All the Prussians are rated as standard .
Dave took the Austrians, as he was on that side where the camera was placed (we were playing via Zoom). The Austrians had an infantry brigade of four battalions and a medium battery. A light infantry brigade of two Grenzer battalions. An artillery brigade of two medium batterys, And a cavalry brigade of a regiment of Dragoons and a regiment of Hussars. All the Austrians are rated as standard, except for the artillery who are superior and the Husssars which are inferior.
We decided to roll dice for the commanders. Both sides Commanding Generals, were "Dithering", as was the Austrian artillery commander. Both Prussian brigade commanders were "Dashing" and the rest on both sides were "Dependable". For those unfamiliar with the rule the implications of this will come clear later.
Initial Dispositions - Ready for Game Turn 1
Game Turns 1 to 2
The Austrians made a stately start using their Grenzers to move through the wood and threaten the Prussian right flank. In response the Prussians orientated their right forward brigade to face off against the Grenzers and the Austrian Infantry Brigade advanced into battle formation on their right.
The left rear Prussian infantry brigade is advanced to conform to the brigade to its right.
The Prussian Cavalry brigade advanced, but the Austrians had not yet decided to move.
Game Turn 3
The Austrians were forced back into the woods from the fire they received, to line the edge of the wood. Their infantry brigade moved up on their right flank.
The Prussians right brigade moved into line with their left flank refused. The other Prussian infantry brigade continued its advance to support its friends.
There was an exchange of fire and both sides took casualties.
Game Turn 4
The Prussian right brigade were pushed back through the combined fire of the Grenzers and the Austrian infantry brigade. Casualties mounted.
The Austrian infantry brigade's command and control failed and they didn't advance in support of the Grenzers. Also the Austrian Cavalry had not yet decided to become involved in the battle.
Game Turn 5 - After the Movement Phase
This is the game turn it started to go pear shaped for the Prussians. Both "Dashing" brigade commanders became "Inspired" and their "Dithering" Commanding General was nowhere in sight to be able to restrain their behaviour. They both advanced and charged the Austrians.
To make matters even more interesting the Austrian infantry brigade commander also became "Inspired".
The Austrian Cavalry fell back to avoid artillery fire and also due to the fact that the "Inspired" Austrians have seized KUTZDORF.
Game Turn 5 - End of Turn
The observant reader will notice that there is one less Prussian battalion in the right forward brigade which was "Done For" in the melee. And the Austrian's lost a battalion as well.
Game Turn 6
Another turn of carnage, with the Austrian artillery and the Austrians in KUTZDORF destroying the leading Prussian battalion of the left Prussian infantry brigade.
The Austrians regrouped and formed a stronger line in the centre. While the Austrian Cavalry continued to decide to stay where they were despite the wishes of their Commanding General.
One of the Grenzer battalions was forced to retreat from fire.
Game Turn 7
Another Prussian battalion in the right forward was destroyed by fire, and its artillery was forced to limber and retreat.
The omens and portents were not good for the Prussians as the Austrian Cavalry had decided to enter the fray at last!
Game Turn 8
The final denouement.
It had to be that on this turn that the Austrian Commanding General encouraged the Austrian Cavalry Commander to become "Dashing" and he "Inspired" his Dragoons to glory. They charged the Prussian guns and even though they were supported by the Prussian Dragoons the guns were destroyed. The Austrian Dragoons pursued into the Prussian Dragoons who had to retreat from the subsequent melee.
With the Austrian forces now reformed and continuing their advance the new Prussian Commanding General, he had replaced his superior after he had succumbed to his wounds suffered from fire, waved his white 'kercheif in surrender. This was accepted with grace and dignity by the Austrian Commanding General.
Summary
Dave and I have played Seven Years War many times. He introduced me to the period many years ago. We both really enjoyed these rules. They are both simple and yet subtle. As suggested they do give a real feel for the period. Our next encounter is going to be in the Weser Valley on the western front of the war.