Bolt Action - Game Report 7

Battle for Key Positions - Sicily Aug 1943

Introduction

Kevin and I wanted to try again relatively soon so that we wouldn't lose momentum in our understanding of the rules. We were joined in this venture this time by Paul, who was given a sub-command to play around with.

Situation

The allied advance across Sicily has started to gain momentum. However, the Germans were using every opportunity to counter-attack and cause delay. 1 DOG's mission had seized its initial objective, and C Coy led by 9Pl has been ordered forward to exploit the success. 

Enemy Forces

A scratch force of German Grenadiers  was known to have been in tactical reserve in 1 DOG's sector. Reports from local resistance fighters indicated that this reserve had been reinforced with engineers, mortars and an armoured car. Officer reinforcements had been identified; an Oberfähnrich Frith seems to have been assigned to Leutnant Parry's platoon.

Friendly Forces

CO 1 DOG had assigned OC 9Pl an M5 halftrack from divisional resources and a Bren Gun Carrier from the Bn Carrier Platoon, a FOO, and a Mortar section from the Bn Mortar Platoon and Sgt Grimes from the Bn Sniper Platoon. 9Pl had recently been reinforced following earlier casualties; along with his 2 veteran sections he now had a new regular section from the Bn reserves.

Mission

9Pl 1 DOG is to secure the four objectives, and to destroy any enemy that try to seize them.

Combat Report

This report was submitted after the action by OC 9Pl, with additional commentary from Sgt Grimes.

The objectives we had to seize were located across the Bn front. Given my resources it was impractical to seize them all in one go. I decided that I need to secure at least two rapidly and then move to seize the remaining two as circumstances permitted, and at the least to use fire to deny them to the enemy.

I deployed my new regular section in the M5 half track to seize the objective on the hill to my right front in a coup-de-main. I left the Piat team mounted in the Bren carrier as my anti-armour reserve. 1 and 2 sections would advance with me through the centre to secure the building and then be prepared to move left or bring down fire as required.

Sgt Grimes was able to deploy along with the FOO and the MFC early into overwatch positions.

The FOO reported an enemy section advancing on the buildings, he brought in an artillery strike, which was only sufficient to pin them in place for a while.

3 Section were able to debus from the M5 Halftrack and seize the objective on the hill. From there they ha excellent fields of fire and were able to bring fire down on the enemy infantry to prevent them advancing. Unfortunately the arrival of the German armoured car managed to destroy the halftrack. We needed its firepower.

With the seizure of the building objective by 1 Section it was able to rush the building over the road. The Germans infantry section in the cornfield rallied from the artillery and fire from 3 Section and launched a vicious counterattack and overran 1 Section before they could secure the building. 2 Section tried to press on through the woods, but they came under sustained and accurate fire from the German section on our left, and the armoured car which was brought forward to engage them.

I deployed the PIAT team from the Bren carrier into the objective building, looking for the opportunity to engage the armoured car behind the other building. At that time we heard anxious raised German voices followed by some wild fire from the other building, and the FOO reported that Germans were seen running to the rear in panic from the building. I rapidly redeployed the PIAT team to the building to try and engage the car, but it withdrew from its exposed position.

Sgt Grimes reported that he was able to deploy effective fire from his position to damage the enemy HQ forcing it out of the battle. He was able to eventually maneuver to a better position to be able to bring effective suppressive fire down, along with the Bren carrier on the left most German infantry section. Throughout this action 2 Section grimly held their position despite their casualties.

Outcome

An interesting battle. The British one by 2 objectives to 1, but it was getting very close as we moved into the extra game turn. Another fine game to learn lessons on tactics and the rules.


ADLG - Game Report 15

Galatians (72) vs Graeco-Bactrians(46)

Another army for me to try my luck with. I have to confess that I consider myself still in the experimental stage of ADLG gaming; trying different armies and tactics to see what can work, what cannot and what is damn right suicidal.

For this experiment I chose the Galatians. I mixed in some Greek's but I have to confess that I think the Army List is a little ambiguous on this Army and a couple of others in relation to options and tribes. I shall be asking questions in the forum to see if the wise and well read can explain to me the options better.

My initial deployment placed my Cavalry on the right, and the main infantry commands in the centre and left. My plan, as much as it was, was to delay and hold on the right, and to use my elite heavy swordsmen in the centre to breakthrough past Paul's elephants and their supporting medium javelinmen. 

I had reasonable command dice and for once the impetuous Galatians closed the distance quite quickly with my line conducting a right wheel to engage. I even withdrew my cavalry to better protect my flank. Albeit at the expense of two light cavalry units. 

Contact is made, and this is where it started to fall apart. My attack in the centre did not go well. The Elephant destroyed and elite heavy swordsmen in one round of combat and disordered another. I destroyed one of the javelinmen but the other was a stand off!

After this I missed an opportunity to zoc his light cav and prevent his cataprachts from closing in rapidly to destroy my cavalry and chariots.  On the left we closed to close combat with the pikes, and along the line we failed to have any success with the majority of my troops losing the first round of melee.

Outcome

With the disorders caused and the losses from the cavalry engagement and the centre my army lost cohesion and lost the battle.

Lessons Learnt

  • I perhaps allowed the cavalry to become too engaged, and expected much too much of them to succeed against the cataphracts.
  • I certainly missed the opportunity to use zocs to pin and delay to my advantage. 
  • I could have aligned better on the charge on the left, but in the end the dice ruled against me.
  • As for the centre; let's just say that when the gods are against you .... bow down and await your fate


age of eagles computer assisted

Age of Eagles (et al) Computer Assisted

Introduction

In the past few years I spent a lot of time solo-gaming. I found that one of the biggest challenges was sticking to the game sequence. The more complicated the rules the greater the challenge. As a (relatively) competent programmer I wanted to see how I could automate the sequence and take some of the trudge of calculating combat etc. 

The major breakthrough I had was that I, like many other wargamers, allow our fingers to do the walking over the quick reference sheets. Making sure we point to a factor on the sheet to count them. My epiphany is why not do the same on the touchscreen of a computer and then let the computer roll the bones for you.

It is also interesting that using this solution has helped me introduce the game systems to new players. It liberates them from the mechanics of combat calculations and instead seems to place them in the command seat making battlefield decisions on moving and committing their forces to action.

I have tried this a number of times with different rule sets now with varying degrees of success. I think one of the better solutions I have come up with is for Fire and Fury and Col Bill Gray's Age of Eagles rules and the derivatives.

Age of Eagles Solution


This set of pictures are from the Age of Eagles variant, but I have adopted for all of the games on this welcome screen. It helps if you are familiar with the rule system, but I think you will appreciate the effect I am trying to achieve even if you are unfamiliar with the specifics of these rules. 


This is the initial screen where one can set the game scenario features. One can save and load scenarios. I have also added some features to play solo. Basically these allow the player to generate different courses of action, weight them and then computer chooses the plan the commander follows.

 There are a couple of additional features as well to do with doctrine etc but I can cover those in more detail in a later post if people are interested. There are two other features. The first displays the die rolls - a confidence building measure! The second allows the program to manage events such as the arrival of reinforcements etc. I will cover the "Adjust Casualties" button later.

The convention is that for those options, such as combat modifiers, the option is selected when it goes gold as per the display dice rolls selected here.

The Event manager has a number of options for handling random time of arrival, decrementing dice rolls etc. This is all set up before the game starts.

On to the game. I have programmed the application to follow exactly the sequence of play. As with most games the first thing every thing to do is to determine who has the initiative.

Next up in Age of Eagles et al is the First Player's Tactical March Phase

Starting with Reserve Movement. In this case I have selected modifiers for conducting Reserve Movement last time and being disordered. (Other factors might apply but this is just to show the principles!)

By pressing "Check" the computer goes away, rolls the bones, and calculates the answer. Remember that in selecting the modifiers and pressing "Check" it is your finger on the touchscreen that is doing all the work. 

We aren't using a  mouse here! the tablet is as easy to hold and use as a Quick Reference Sheet!

Let's move on the Tactical Movement. In this case I have chosen a number of other options for this unit. A slight difference here is that in order to get the +1 for detached leader one merely has to press the Detached Leader button, or similarly for Attached Leaders or Cover etc. 

And the results are here. Perhaps I should explain the dice rolls showing as [4 + 4] in this example. The first 4 is the D10 die roll, and the +4 are the positive modifiers. 

In Age of Eagles et al it is important to capture the fact that someone is disordered, not because it is a factor but because one looks up the result on a different table. Hence it allows the computer to give you the correct and expected answer.

So onto the Defensive Firing. I won't bother showing the Attackers fire phase as this is identical, so pay attention! 

If you play these rules the form looks very much like the quick reference sheet. It has the range bands across the top, with the weapons down the left and the fire factors for each category weapon where the two intersect. For the artillery the factors are Heavy on the left medium and light on the right.

One then simply calculates the total fire factor at the target and then one uses the slider to register the fire points. Choose the factors and then press "Fire". The Artillery modifier is not really a modifier, it rather ensures that the result relates to artillery and not infantry.

The other wrinkle I have added to help those who need to take of their socks to count to twenty is that I have added a calculator. 

All one has to do is to press a fire factor and the calculator pops up. Simply select the number of elements/models firing at that factor. Use the multiplier if relevant from a half to two times, and then press "Add" and this cumulatively adds the calculator total to the Fire factor.

As suggested the results are very straightforward after pressing "Fire". In this case the computer rolled a 7 and the modifiers were +1. As you can see because we selected firing at Artillery it only shows the effect on artillery.

On to Charge Combat, and where casualties mount; if you get your charge going in correctly and in numbers. So this works in a similar way to the other screens. 

A minor note is that where there is a button and an associated text box such as "Troop Rating", and "Outnumbered", one selects the text and it cycles through in the box to its right the options available. I think the selections are fairly predictable. 

At the bottom it shows the cumulative modifiers for the attacker and defender; another confidence building measure to reassure the players that all is in order and the computer knows as much as they can calculate in their heads. The nice thing is doing it this way it is very difficult to miss factors.

And finally after one has pressed the "Fight the Melee" one gets first the Attacker result.

And then the Defender result. Didn't the Austrians do well!

A final word on the "Adjust Cas" button you have seen throughout. One of the nice features in the game is that once a side has reached 30% losses it starts to suffer a -1 modifier on tactical march for each 5% after that. This means that at 35% losses one suffers an immediate -2 modifier. That means in my experience that as the losses mount it becomes increasingly difficult to maintain the momentum going forward and Brigades start going backwards rather than forwards! In this solution losses are tracked and this figure is calculated by the computer. However, given that losses in the Melee can mount and when their is one element or stand left in a Brigade it departs the field means that one needs a means to adjust the casualties recorded to align with the dead pile next to the table. This table allows for that correlation and adjustment. 

Conclusion

So far I have had good reaction for this tool. It is surprising how intuitive it is given we all stab our fingers through paper quick reference sheets from time to time. In point of fact my Fire and Fury quick reference sheet is now over 30 years old and quite tatty!

If you have any thoughts or questions on this tool then please just let me know. It is only one of a number of these tools I have created for a wide variety of rules.

Bolt Action - Game Report 6

Meeting Engagement in Sicily (part 2) - Aug 1943

Introduction

Following on from the Bolt Action Tournament I seized on the opportunity of a further Bolt Action game with Kevin, to further hone my understanding of the rules. Kevin had played before but not recently, and not with version 2.

Situation

Given the increasing fragility of the Italian commitment to the axis alliance, the Germans had moved up a Panzer Grenadier Battlegroup to face of 1 DOG's sector. The Brigade mission was to expand the bridgehead further along the valley where 1 DOG's last action was. The Brigade commander had ordered 1 DOG forward again to advance to contact and clear the sector of enemy forces.

Enemy Forces

Overnight patrols detected the German Panzer Grenadiers arriving. A captured reluctant ost troop grenadier reported that the most forward troops were a platoon of 3 sections, supported by a mortar section, armoured car and a half track commanded by a Leutnant Kevin Parry. He was described as new to the front but a wily and experienced tactician.

Friendly Forces

CO 1 DOG had secured the support of an M5 halftrack from divisional resources and a Churchill from C Squadron 147th Regt RAC. Along with 2 of his 3 veteran sections and a FOO, and a Mortar section from the Bn Mortar Platoon, OC 9Pl was well placed to give a good account of himself. 

Mission

9pl 1 DOG is to advance to contact in sector and destroy any enemy they encounter.

Combat Report

The report was written by OC 9Pl after the action.

We managed to infiltrate the FOO and the Mortar Fire Controller (MFC) into overwatch positions before we advanced. This was timely and was instrumental in the action that followed.

My plan was to advance on the bridge crossing, as we would need that later. Additionally I hoped it would prove to be a magnet to draw the Germans onto my weapons so I could destroy them by long-range fire. 

I advanced 1 Section on my left to secure the woods covering the bridge. That way they could secure my left flank. I left 2 Section in reserve, mounted in the half track. The Mortar baseplate deployed behind me, with the Tank moving towards the bridge.

The Germans advanced down the road with their armoured car with a Panzer Grenadier section to the right of this with the platoon commander. Another section was heading for the bridge across the field system, and we heard engine sounds from our right flank.

Our FOO called in a divisional artillery shoot on the enemy to our left front. It was exceptionally well timed and accurate. It destroyed the armoured car and seriously pinned down the enemy infantry in the woods 

1 Section went into ambush in the woods, and not a moment too soon as the Germans recovered from being pinned by the artillery and started to advance. They were extremely tenacious and continued to advance under fire to 1 Section, who returned fire and both the enemy and 1 Section suffered a number of casualties.

In the centre the Churchill and mortar section pinned down the German infantry in the field heading for the bridge. They never left the field system, and their morale broke under sustained fire and eventually retired. They were no longer a threat.

On our right the Germans had discovered a ford across the stream for their halftrack, and debussed an infantry section to take us from the rear. In response I ordered 2 Section forward on the halftrack to occupy the building on our right as a strongpoint. While the Churchill was engaging the enemy in the centre the enemy halftrack broke forward and brought its machine guns to bear on the Mortar section destroying them in one volley. 

The half track withdrew after destroying the mortar section and then came under fire from the 2 Section in the house which forced the vehicle to withdraw. 

By this time, with the centre no longer being threatened, I recalled the Churchill to support 2 Section and to engage the enemy half track. The tanks shooting was appalling and they failed to register a main gun round on target. Eventually the combined firepower of 2 Section, the halftrack and the tank MGs destroyed the Germans who had debussed from their halftrack, and at that point the enemy had no more stomach for the fight and withdrew. I regrouped and consolidated my position. 

Outcome

A British victory 3 to 1. A very exciting game that went both ways in the middle. Kevin and I both enjoyed it and learnt a lot about the rules - once we found the correct place in the aforesaid rules!

I am sure we will all be playing more BA in the future as an alternative to ADLG.


Age of Eagles - Game Report 2

Refight of Encounter at Perlach

Introduction

I have looked at a lot of wargaming rules, but I often return to the same sets to play games. Fire and Fury and Col Bill Gray's derivative sets- Age of Eagles - are just one set. 

My friend "up north", Dave, expressed an interest in exploring Age of Eagles as he was looking for a grand tactical or operational level set of rules for the Napoleonic period. Of course I volunteered to put on a game for him. It was an excellent opportunity to conduct a "so what" game. I had the terrain set up for "The encounter at Perlach", why not refight it with Dave in command of the Austrians?

The Game

Well for a start the Orders of battle remained the same, with each of us having a Corps each. My French Corps of 2 Infantry Divisions and a Lt Cav Division, his with a standard Austrian Corps of 1809 with 2 line Infantry Divisions and a light or Advance Guard Division. The one change I did make was in the troop strengths in the orbats. I changed the French large Infantry Brigades and isntead deployed them as individual regiments. I wanted to see whether this would increase the tactical flexibility available to the French.

The Austrians arrived on the battlefield concentrated and in mutual support. The Advance Guard on the left supported by a Line Division and another Line Division using the road to seize Perlach  and the adjacent woods.

In the distance the French Infantry have also arrived concentrated and they advanced astride the centre wood. There were some low hills between the two woods to the French front that would be ideal for artillery to dominate the ground to the front.

The Austrians have managed to secure Perlach and its woods and Haching to its south. The remainder of the Divisions are forming up to support the defence of these positions. The Austrians are conducting a classic defensive battle.

The French deployment did not go smoothly. The right of hand of the infantry divisions, advancing through the gap in the woods, had a number of command and control failures and failed to advance. Moreover the initial artillery duel went very much to the favour of the Austrians. The French Light Cavalry Division has arrived and is in support on the right flank.

The Austrian cavalry attempted to overrun the French Artillery but were thrown back with losses and disorder. Their overall position remains sound with a series of strong points along the front. Dave wanted to see how the charge mechanics and combat worked out.

 Meanwhile the French Infantry regiments are moving forward to the attack!

After a series of inconclusive exchanges of preparatory fire, the French went over to the attack and their columns advanced to engage the Austrians. The Austrians were thrown out of Haching by the Baden Brigade supported by French Light infantry, The Austrian Grenzers retired in relatively good order to the high ground to the East of Haching. 

On the Austrian right flank the fight fid not go quite as well for them. The Hessian Brigade and French Infantry Brigades successfully attacked the woods to the North of Perlach. Driving the Austrians back with significant losses. However, Perlach was proving a much more difficult nut to crack. The Viennese Volunteers fought grimly and threw back a number of French attacks. The French decided to regroup and conduct a musketry duel.

Outcome

For my part I enjoyed the game. Dave obtained a good appreciation of the rules, although he remains skeptical about the formations that the rules allow. He felt that the rules gave more a flavour of an 1870 battle rather than Napoleonic. Although he did like how the skirmishers were dealt with in the rules.

A takeaway from the game was that the change to the French orbats seemed to work well. Dave recommended that I try to keep the infantry formations to around 3000 men and adjust the orbat accordingly. A reasonable suggestion  which I shall explore further.

For the combat calculations I used my automated game assistant, which works well and liberates one from the boring sums and calculations. However, it might have been better if I had used the combat table for Age of Eagles rather than the one for Fire and Fury! This is why it might have been a little too 1870 rather than 1809. 

That flaw in the automated assistant has been fixed and the result seems to be much better in the couple of game turns I played on playing solo!


Bolt Action - Game Report 5

Operation Entoyment July 1946

Introduction

This was the third of three tournament games at Entoyment. This was Bolt Action Scenario 5 - Top Secret.

Situation

1st Bn Duke of Glendon's Light Infantry were on live firing exercise with their armoured and artillery support troops in Northern Norway. 2 days ago into the exercise the CO was contacted by the War Office to ready a small force for a covert operation into Finnish territory to recover a package from a crashed Russian light plane that was in Finland some 10 miles inside the Norwegian/Finnish Border. 

The package contained highly sensitive Soviet planning information that could be instrumental in suppressing Soviet covert operations to take over newly liberated countries in Eastern Europe . 

Enemy Forces

We understand the Finns have been alerted by their Soviet controllers and are moving a mechanized force to recover the package themselves. The commander in the area of the recovery operation is Luutnantti Jason Cossey, with his second in command Ylikersantti Adrianna Cossey.

Friendly Forces

The CO has put together a crack force under OC 9Pl. 9Pl has 3 sections each of 8 men including a LMG and its Piat team, they are supported by a Churchill from C Squadron 147th Regt RAC and a FOO, and a Mortar section from the Bn Mortar Platoon.

Mission

9Pl is to secure the package and extract it to Norway as quickly as possible.

Combat Report

This report was prepared for SIS and the War Office by an unnamed intelligence operative seconded for the operation. It is to be protected under the 50 year rule.

OC 9Pl had a sound plan. He sent 1 and 2 Sections left flanking to approach the package from the cover on the left. Meanwhile the Churchill tank would dominate the centre and protect the package with MG and direct fire. 3 Sect would provide support advancing through the cover on the right centre.

Right from the outset we saw that the Finns were ready and willing to use force to recover the package for the Soviets. 

The FOO was able to bring down highly effective concentrations of fire down on the enemy as they were trying to deploy. It certainly bought 9Pl some valuable time to move to the package to recover it. Unfortunately OC 9Pl was unavoidably detained and missed the start of the engagement; had he been there he might have been able to influence operations for the better

Although it was late in arriving the Finnish armoured support stopped the advance of 1 Section. Although 2 Sect did manage to secure the cover adjacent to the package. However as useful as the Churchill was it proved unable to fully suppress the Finnish artillery piece, or destroy their armour. The fire from this artillery piece destroyed 2 Sect before it could recover the package.

With the loss of 1 Sect a Finnish section managed to secure the package unscathed and started to withdraw with the package. Fortunately the Churchill was alert to this and before they had gone too far they were destroyed by the Churchill's machine guns. The Finns managed to use their two remaining sections to move up and complete the extraction of the package despite the fire being directed at them.

3 Sect tried to intervene, but losses they had already suffered, and the need to destroy a Finnish Infantry section blocking their way, prevented them getting anywhere close to the package. That was despite the best efforts of the Mortar section to provide fire support.

Outcome

It was unfortunate mission that saw the package recovered by the Finns for the Soviets and allowed them to secure Eastern Europe in their expanding hegemony.

For my part I did not come last in the competition, despite my best efforts. I was rewarded by selecting as my prize a fine 28mm Soviet personality sniper for my forthcoming Bolt Action Soviet force.


Bolt Action - Game Report 4

Into the Ruins of Caen July 1944

Introduction

This was the second of three tournament games at Entoyment This was Bolt Action Scenario 3 - Key Positions

Situation

Operation Charnwood is going well. The northern outskirts of Caen are now being mopped up. However, there are three key positions that need to be captured in order to ensure we can secure crossings over the River Orne.

Enemy Forces

Wireless intelligence had reported that a Battlegroup of 15th Panzergrenadier Division had moved up to defend the ruins of Caen. The wireless intercepts indicated that they were commanded by Leutnant Mike Ems. A tough and experienced veteran of many years of combat.

Friendly Forces

9Pl has 3 sections each of 8 men including a LMG and its Piat team, they are supported by a Churchill from C Squadron 147th Regt RAC and a FOO, and a Mortar section from the Bn Mortar Platoon.

Mission

9pl 1 DOG is to capture the three key positions identified by Bde HQ to secure the start line that will enable us to force a crossing over the River Orne

Combat Report

This report is prepared by the Tank Commander from C Squadron 147th Regt RAC

The initial advance seems to have gone well, with all the infantry sections moving forward well. 1 Sect moved left, whilst 3 Sect secured the initial objective. No 2 Sect on the right reported that they had secured the building in front of the middle objective.  In doing so they had destroyed a truck and some infantry debussing from it. 

My loader reported a Nebelwerfer deploying to our left front. It was able to put down one salvo before we destroyed it with our MGs. 

It was during this action that I heard over the radio that the FOO was down; he had been hit by a sniper and was being casevaced.

No 2 section went into defence in their building.

The Panzer Grenadiers viciously counterattacked and secured a foot hold in the building. From their higher elevation they were able to bring suppressive fire on 2 Sect. A German armoured car tried to intervene but couldn't stand against my tank. It rapidly withdrew, I heard some PIAT rounds explode on my right flank, but there was no secondary explosion and I heard nothing more from the PIAT again.

German progress was exceptionally rapid after this. I was pinned down by mortar fire, but I continued to use my Coax and hull MGs to best effect as possible. I couldn't prevent the Germans overrunning the near objective when 3 Sect were destroyed, and 1 Sect on the left faired no better.

The Grenadiers securing the objective.

Outcome

9Pl failed to secure the key positions and lost heavily in the process. A loss. 


Bolt Action - Game Report 3

Sicilian Meeting Engagement - Aug 1943

Introduction

I took the 9pl 1st Bn Duke of Glendon's Light Infantry (1 DOG) into battle at Entoyment in a Bolt Action Tournament. There were three scenarios to fight against a disparate variety of enemy forces. This was Game 1.

Situation

The British landings in Sicily have been successful. Losses are moderate and now the mission is to enlarge the beachhead as soon as possible to gain space for the follow on forces to land and deploy.

Enemy Forces

Intel reports suggested that despite the Germans lack of trust in the Italians, that they have committed Italian forces against the British area of oppositions. Given that they are fighting on home ground they are likely to be a more difficult opposition than they were in the Desert. A deserter has reported that the enemy commander in the area is a certain Sottotenente Josh, a young man of skill and cunning.

Friendly Forces

9Pl has 3 sections each of 8 men including a LMG and its Piat team, they are supported by a Churchill from C Squadron 147th Regt RAC and a FOO, and a Mortar section from the Bn Mortar Platoon.

Mission

9Pl 1 DOG is to conduct an advance to contact, destroying any enemy in they encounter

Combat Report

The report is prepared by OC 9Pl.

We started our advance cautiously following the main road, as we wanted to secure the bridge. I sent 1 sect left to find a position to cover our planned crossing. Meanwhile myself and 2 Section came on to the left of the road and 3 Section to the right. We left the road to the Churchill. The FOO and the Mortar section came with me. The Foo to deploy into the building to look for targets of opportunity, and intention was to set the Mortars up the base plate in cover to the rear of the building.

Our Churchill managed to slow the advance of an Italian section, but it was wholly unable to find the range to destroy an Italian armoured car that was causing us severe problems from our left flank. The car's automatic cannon disrupted and pinned down 1 Sect who failed to advance to the covered position we needed.

The FOO called for fire but he managed to transpose the grid reference of the target and the fire ended up 1500m in the rear of the Italian lines. 

Our mortar section were taken out before they could bring effective fire to bear on the enemy. The Italian mortars managed to successfully find the range and started to cause issues for 2 Sect which were pinned down and unable move forward.

3 Sect managed to occupy the building to the right of the road and brought effective fire on the Italians to our front.

The advancing Churchill was effective in suppressing the enemy even though it failed to destroy the armoured car. Its machine gun fire supporting 3 Sect was sufficiently effective to destroy a rifle section.

2 Sect were in serious trouble, their morale was fading fast but they managed to stay with us and fell back after the fight in good order.

Outcome

The result was a draw with one unit lost from each side.


ADLG - Game Report 14

Early Imperial Romans(85) vs Germans(91)

My friend up-north wanted to get a feel for ADLG, so I agreed to put on a Zoom game for him with my Romans vs the Germans. 

I gave him the Romans to play with as I felt that the complexities of dealing with hordes of impetuous troops under ADLG would be a bit of a challenge. Moreover, I wanted to try out the Germans and I knew that Dave's past experiences of commanding his Romans under WRG 6th Edition would stand him in good stead.

The Roman's deployed concentrated and with a goal of keeping their flanks intact. For my part I wanted to see if I could overwhelm the Romans with my numbers as quickly as possible.

Once we came into contact his Cavalry on his left managed to break through my flank protection and started to work their way around to conduct some rear attacks on my forces. I managed to destroy two Auxilia before the Legionaries provided a much tougher opposition. Despite getting up to three cohesion points they managed to rally these down and hold their own. 

The German heavy swordsmen are approaching the point of contact.

By the end of the game the Romans traded legionary unit for German heavy swordsmen, and once the Roman Cavalry attacked from flank and rear the losses for the German's mounted. On the Roman right flank a brave Auxilia unit held back the German Cavalry for sufficient time for the centre to defeat the German centre. Their sad demise will be sung about in the taverns of Rome for many a long year.

Outcome

The Germans were trashed while the Romans suffered losing 13 out of 21 cohesion points.

Lessons Learnt

  • Dave enjoyed the encounter.
  • Helping someone learn the rules, or at least familiarize themselves with the rules, does help one learn the rules oneself!
  • Dave's tactics of waiting for the Germans to come on to the Legionnaires was correct and a better tactic than mine against the Dacian.

ADLG - Game Report 13

Andalusian Arab(133) vs Nikephorian Byzantine (127)

 I should have expected how this game would go, given it was my 13th! Paul's.

This was to be the first outing for my Arab Army lockdown project. My initial deployment placed the majority of the Cavalry on the open right flank. My goal was to pin and engage that flank to give me free rein in the centre and left.

I was quite pleased with the way the Arab's looked on the table. 

This over-complicated maneuver would have gone better with better command dice, and if my right flank could have bought me more time.

My initial movement was to hold the left flank back and advance it slowly oblique right. Meanwhile the centre command of Light medium troops and horse archers would swing around to the left and approach from the shoreline.

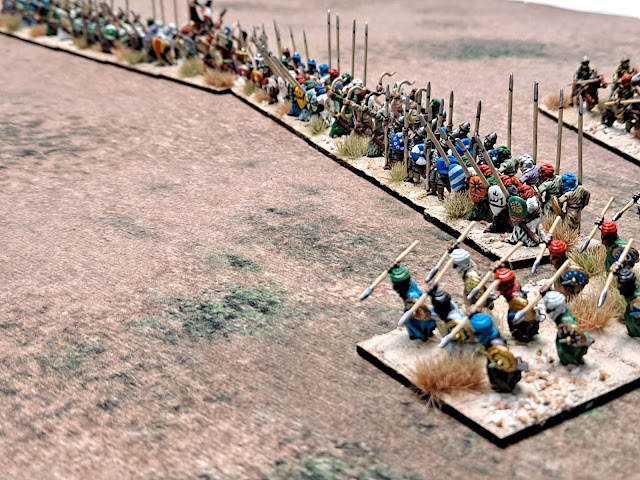
Once I had made contact with my Heavy Spearmen it started to go much better, but not quickly enough as my losses were mounting quicker than Paul's. Although he was starting to get worried about his right flank.

At the same time despite the heroic effort of the Arab Cavalry my right flank looked increasingly vulnerable at the end of the game

Outcome

A 26 to 13 (out of 22) loss to the Arabs, although it was looking a lot worse than that at the half way stage!

Lessons Learnt

  • Try not to over complicate the plan, and instead try for a better initial deployment.
  • Although mixed units may have a lot of firepower, they don't have a lot of staying power when it comes to fighting so try and get into contact as quickly as you can.
  • Try other force combinations for the Arabs, and don't expect to out-bow a heaviliy bow equipped army.


ADLG - Game Report 138

Seleucid(42) vs Aramean(74) I had time for one quick game, and I now hat Tony is a quick player! So onto battle with a relatively historica...