Andalusian Arabs 28mm ADLG

 My 2nd 28mm Dark Ages Army

No sooner than I had one army finished I embarked upon my second. Three reasons. Firstly I had bought some Arab Infantry as an experiment to try the Slap Chop painting technique on, and it would be sensible to complete the army. Secondly I was a little disappointed about whether the previous army would be sufficiently competitive at Warfare - despite my tinkering with various lists. And thirdly I bought a 3D printer and there are some superb models to print for the Andalusian Arab army!

Yusuf ibn Tashfin's Command Team

The Light Troops

The Heavy Spears

The Slavic Mercenary Spears

The Heavy and Medium Cavalry

The Berbers

The Army


ADLG - Game Report 113

Post-Roman Brits (146) vs Tribal Mongols (178)

So with the previous lessons learnt and deep discussions on army selection and design I decided to bring my 28mm dark ages army to the table again as Post-Roman British, but spears this time and not swords. At least spears would be a better choice and allow me to stick it to the Mongols rather than with swords – or at least this is what I hoped! I also reinforced, by printing and painting, some elite heavy cavalry for the revised army.

I won the initiative and decided to defend in the Forest, but in doing so the enemy went out in the night and chopped all those trees down and removed my second forest! I deployed the cavalry heavy command on the left, with the weaker cavalry command on the right, Infantry holding a strong centre.

By the end of the first turn my light bowmen had seized and were holding the forest on my right, while my light cavalry, off screen to the right, seized the hill. I left the other cavalry in a reverse slope position at this stage.

The left of my shield wall, protected by lights.

The line is holding and casualties are light, however, my lights in the forest are taking a beating, I should have retired them out of the line of fire.

I decided to commit my cavalry on my left and started to have some success. Although my infantry line is continuing to take hits from the mounted bow fire. On my right I have precipitately brought the right flank cavalry out and they were quickly overwhelmed, allowing the Mongol light cavalry to try and make an end run for my camp – spoiler alert – they didn’t make it as I was able to close them off.

The Romano-British Cavalry are indeed having a successful battle against the Mongols. They are succeeding in driving them from the field.

While in the centre the infantry line remains broadly intact anchored on the Forest. But unfortunately two rounds of mounted bow fire managed to change that entirely by shooting down heavy spearmen, and allowing the Mongols to penetrate the line.

Outcome

A win for the Mongols by 26 cohesion hits to the 13 they suffered (out of 20). The loss of the lights and heavies to bow fire along with the cohesion hits we suffered were unfortunate and what broke us in the end.

Lessons Learnt

  • I would put this down as a viable army list to use for the dark ages figures I have built.
  • Deciding to rally, and then failing to do so, the lights in the forest rather than withdrawing them was definitely the wrong decision.
  • I may have held back my own cavalry for about a game turn or two more than I should have.
  • ADLG - Game Report 112

    Post-Roman Brits (146) vs Normans (179)

    After much soul searching and discussion after the first outing with my 28mm Anglo Saxons against Paul I decided to trial a Post Roman British army mix. Therefore I chose this for the next trial 15mm game with Kevin I chose this list. From this list I went for medium and heavy swordsmen, but not impetuous, and I reinforced the cavalry with 2 elite heavy cavalry. I was using my Romans as ex-Romans.

    So, the first thing I learnt, the hard way, is that heavy cavalry only have a 1 in 2 chance of beating elite impetuous heavy cavalry, and hence my left wing was blown away again – not least from some great combat rolls from the Normans. However, at least the Norman unreliable General has his feet stapled to the floor on the Norman left flank by the sea.

    The unreliable general decided that as it was all going so swimmingly for the Normans that he ought to come out to play as well. Meanwhile the remainder of my heavy swordsmen fight hard to restore order on the left as well as to try and protect the camp.

    It is now clear that the previously unreliable general is going for a quick victory before the rest of his army can take the plaudits. Meanwhile my heavy swordsmen are at least inflicting some hits of their own in their battle for survival.

    The death throes of my army. The Norman cavalry on the Norman left have imperiously ridden down two medium swordsmen to complete their stunning, if rather late, entry to the battle.

    Outcome

    A 28 to 8 win for the Normans.

    I went on to refight this battle twice more solo, in which I kept Kevin’s original plan with the unreliable General. I adopted a different plan, but the same for both refights, in which I placed the medium swords on the left in the field with the cavalry centre right. In the first refight I followed Kevin’s original plan and committed the Norman cavalry against the medium swords in the field. This was unsuccessful and there was a close but convincing win for the Post Romans.

    In the second option I surmised that Kevin would have moved his right flank cavalry across the battlefield to fall on he heavy swords on the coast. While his centre, which would then be the right, launched a spoiling attack on my left to keep it in place. This was a much closer battle with the Norman’s coming out on top after a hard fight in the centre.

    Some interesting issues were that in both refights the unreliable hesitant general only came into the battle about the same time as he had in our game. In the second option his timing was impeccable as it meant that there was a coherent line of elite heavy impetuous Norman cavalry bearing down on my swords. The side point of note was my use of my cavalry as a reserve which seemed to work well to counter Norman break throughs rather than using it as a shock force.

    Lessons Learnt

  • It was great opportunity to be able to refight the same battle a number of times! Learning several useful lessons.
  • Although the army performed better whilst it wasn’t impetuous, spears may be a better and more flexible option than swords.
  • ADLG - Game Report 111

    Andalusian Arab (133) vs Umayyad Arab (136)

    The last battle of the day was against Iain’s Arabs, another good period match. And once again this was a revised army from those that I had used previously. Importantly this army list was one I was building in 28mm as a possible alternative to my Saxon’s for Warfare. I deployed the infantry up against the shoreline, with the cavalry in the centre and right flank.

    My cavalry moved to avoid the spears in the centre looking for more relevant targets on the flanks.

    On the right they found the targets very enticing to the extent that we managed to force a breakthrough. The Umayyad spearmen are being forced out of their comfort zone and trying to find targets to fight.

    The Andalusian infantry fought of the enemy light cavalry and are now in pursuit, as well as turning to their right to help support their own cavalry. The Umayyad spears are trying to support their own cavalry but their flanks have now been turned as well as the line being broken.

    Outcome

    A win for the Andalusian Arabs by 25 losses to the Umayyad’s while only suffering 9 in return.

    Lessons Learnt

  • A positive outcome for the revised army list.
  • I have learnt that as vulnerable as Medium cavalry are to bow fire they can be very useful on the battlefield.
  • ADLG - Game Report 110

    Ottoman Empire (267) vs Hephthalite Huns (111)

    Second battle of the day was against Paul (aka Hobz) Huns. My Ottomans were formed up with the cavalry on either wing, with the Janissaries and heavy mediocre spearmen in the centre.

    I was attacking and rapidly closed in on Hobz’s right flank while refusing my own right. The Janissaries were particularly effective and far more so than the mounted bows we were facing. On my left the Deli’s have advanced and charged the head of a cavalry column which now leaves its flanks exposed.

    My left flank attack has been very successful and has driven in the Huns, which leaves them with no room for manoeuvre. Meanwhile the Janissaries are continuing to bring large volumes of fire to bear on the Huns with good effect.

    The Huns have been either been driven from the table on my left, destroyed by bow fire, or about to be overwhelmed in combat by my heavy cavalry.

    Outcome

    A win for the Ottoman Empire by inflicting 23 and only receiving 3 hits in return.

    Lessons Learnt

  • Although it is just one battle but this army list seems to have been better than their last outing.
  • It is a distinct advantage against mongol/hunnish armies to attack and reduce their freedom of manoeuvre if at all possible.
  • ADLG - Game Report 109

    Seleucid (42) vs Alexander the Great (40)

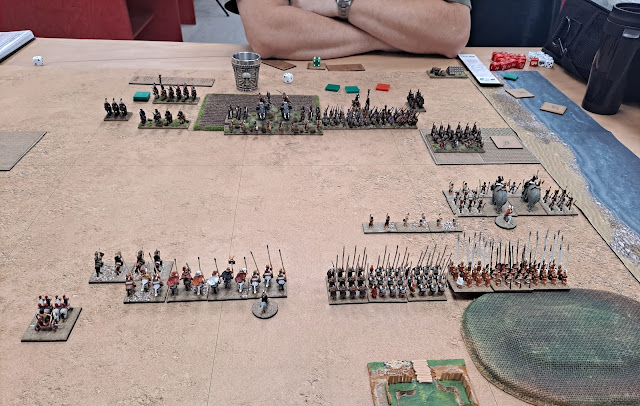
    We once again all convened at Entoyment for another day’s ADLG gaming. For the day I took along three revised army lists, for Seleucid, Andalusian Arab and the Ottoman Empire. First up was a rematch against Paul, and we both agreed it couldn’t be worse than the last battle we fought with the Greeks!

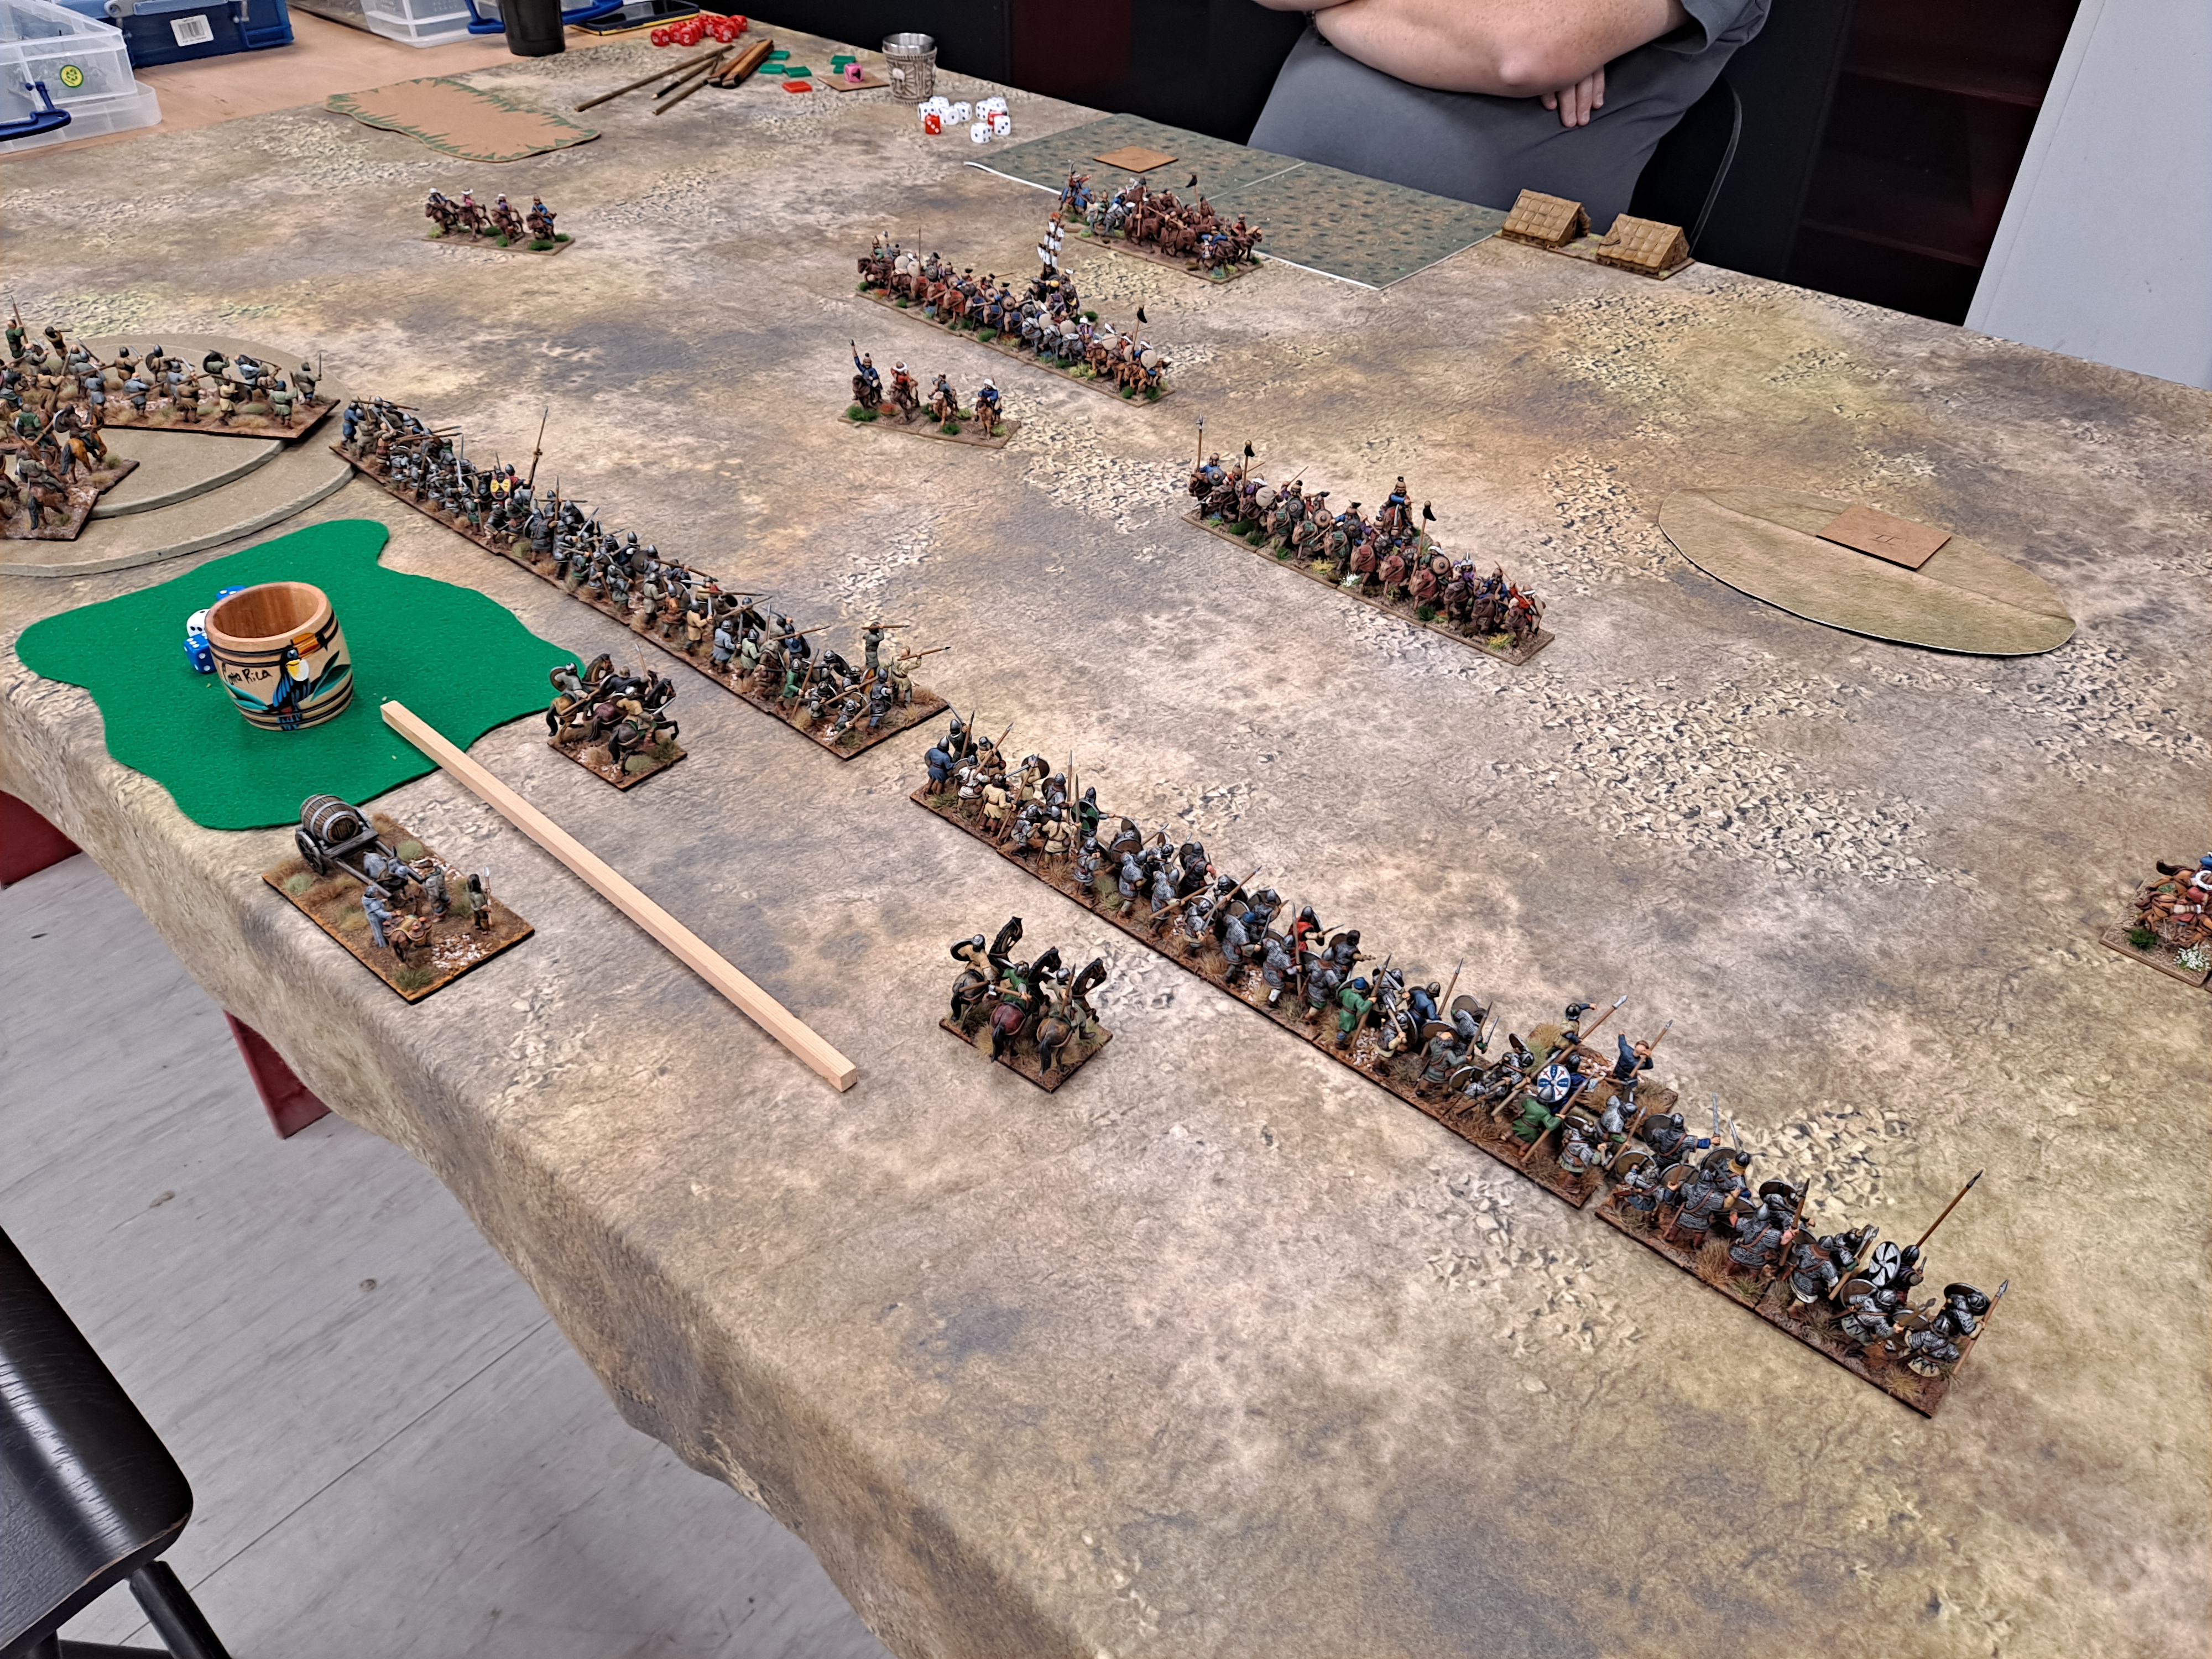
    I pushed forward my elephants while keeping the rest of the Army closely grouped and poised to strike.

    Fortunately, I scored a hit on the lights in the plantation, which rather limited their ability to hold the ground against my elephants. While on the left my scythed chariot was biding its time looking for a suitable target.

    Well, the chariots found a target, as their initial victim evaded. Only to find it up against an elite heavy cavalry unit with an included General – it didn’t survive that outcome. On the right the elephants are making heavy going of the Thracians.

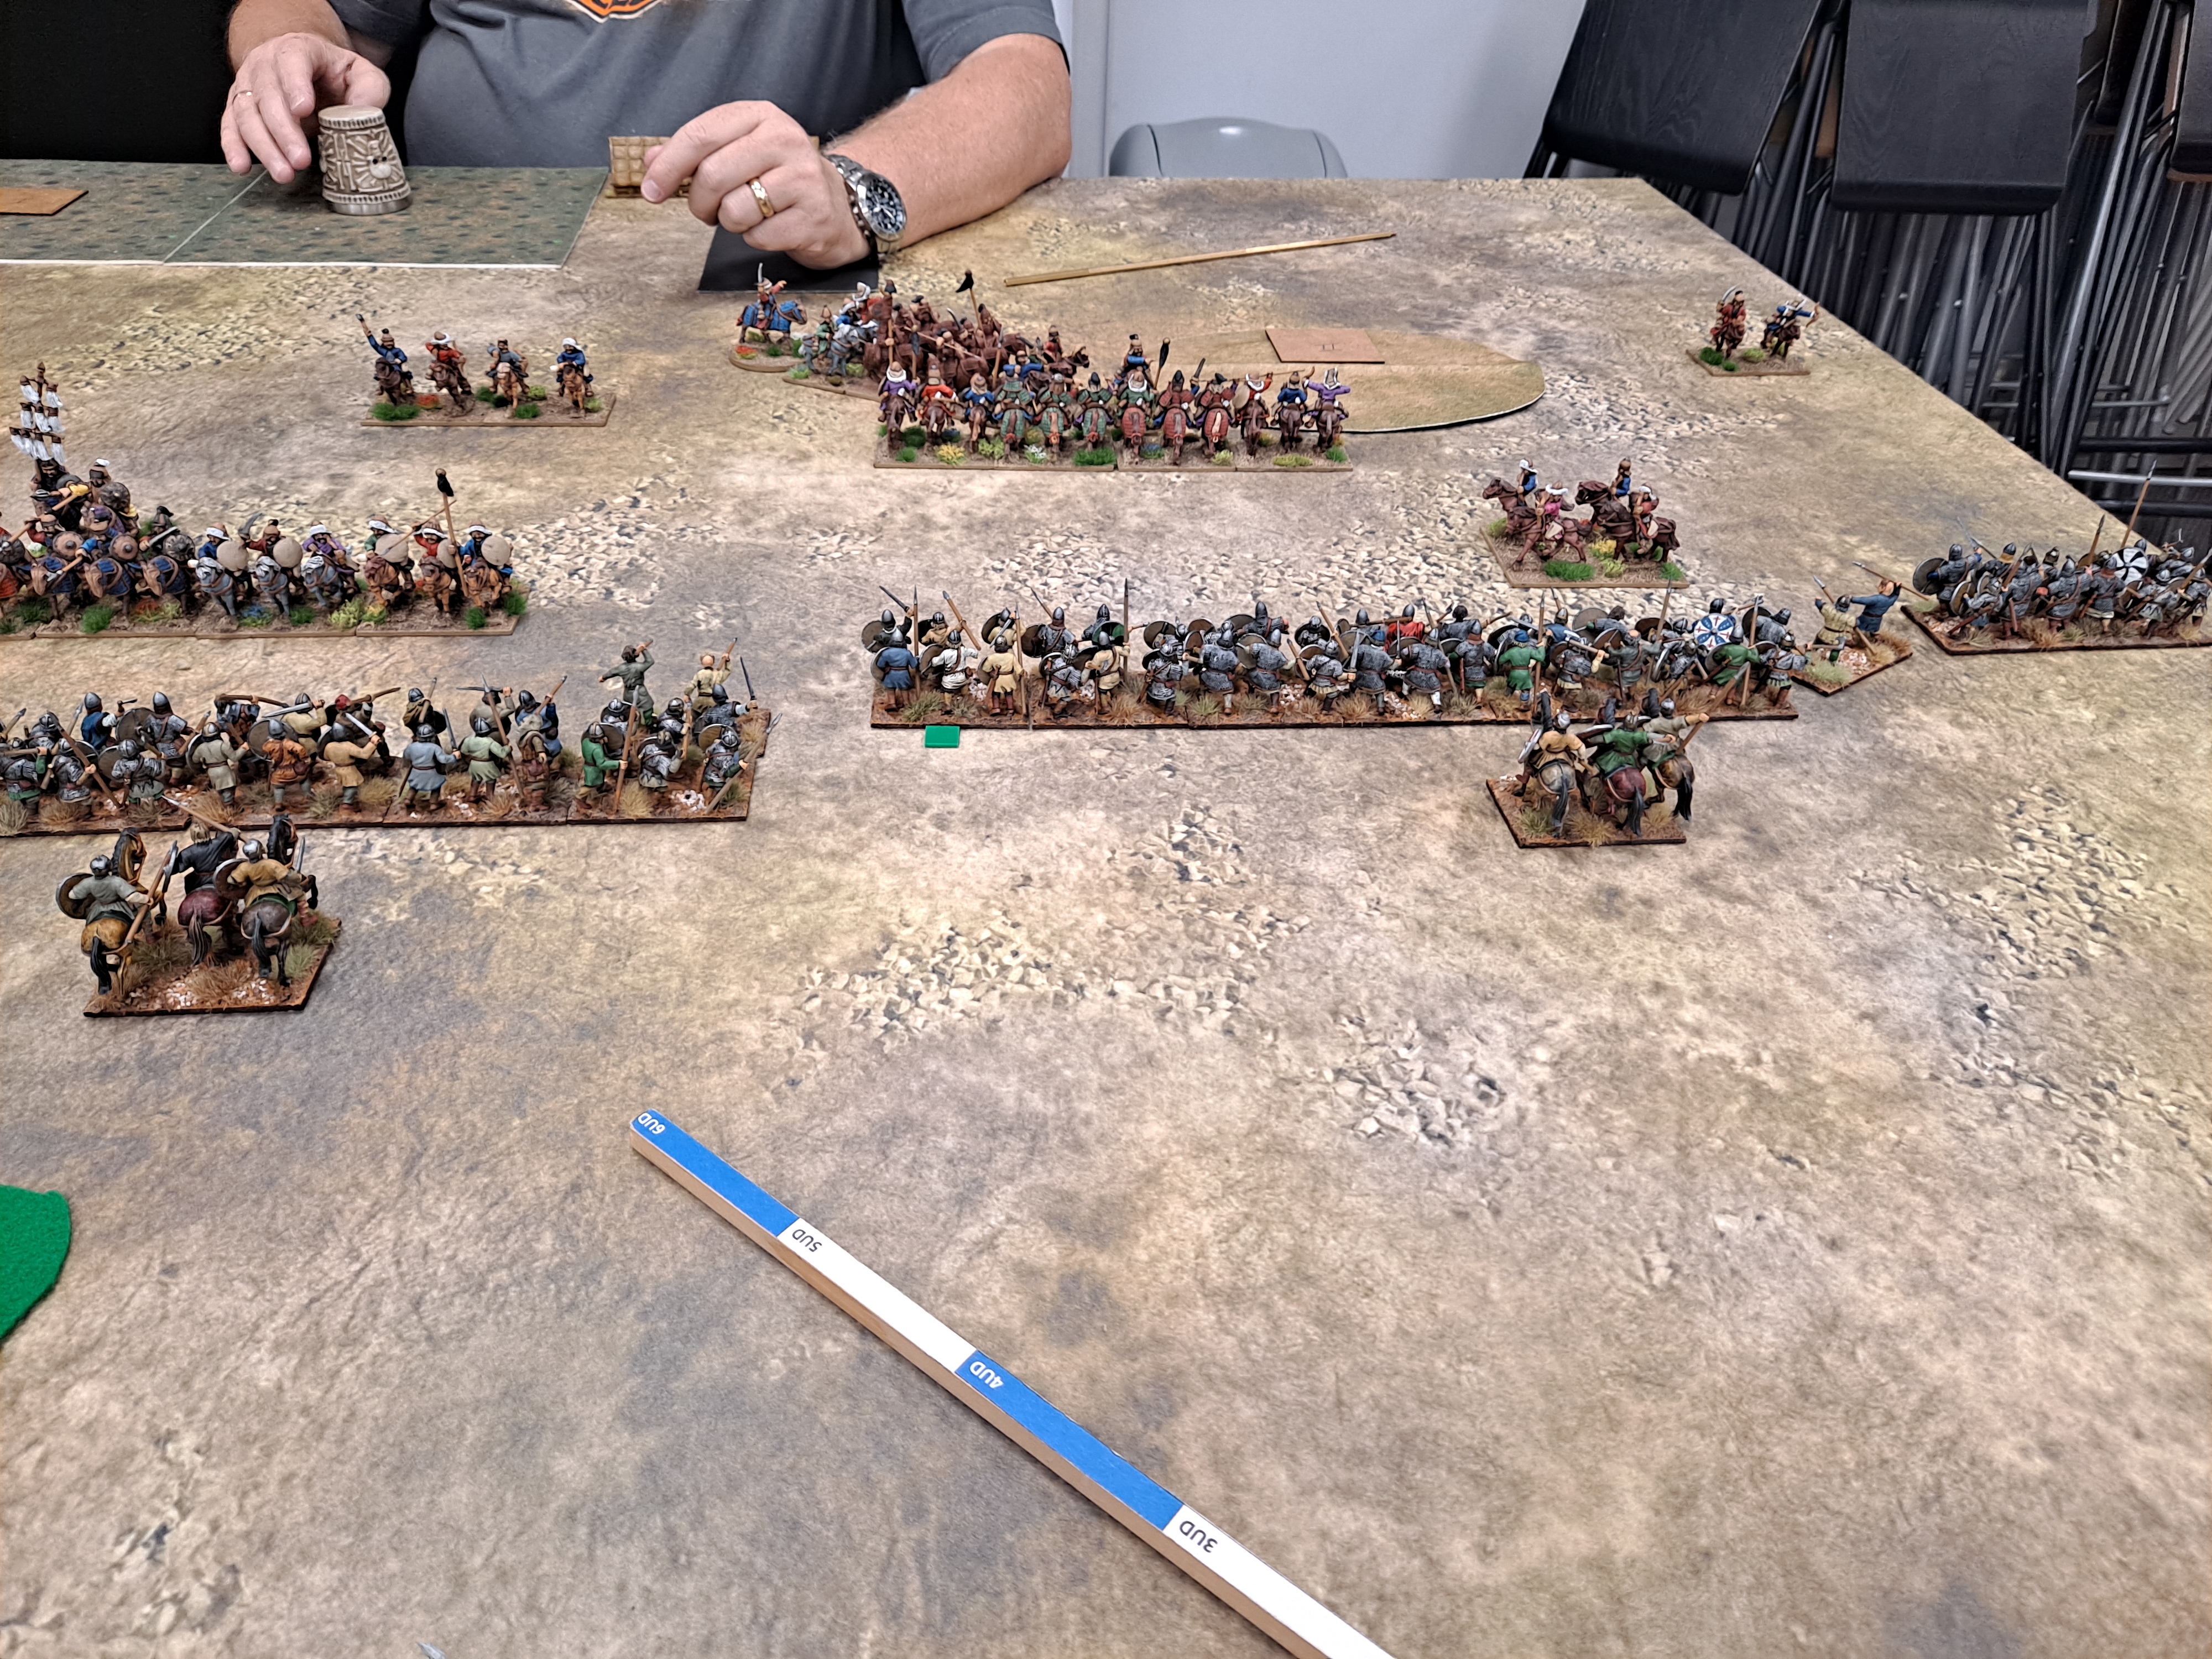
    Unfortunately, one of the elephants was destroyed, but on the plus side its rampage took it of to the beach. In the centre Paul’s elephant has had much more success while my cavalry continues to fight for their lives.

    And finally, my elephants have broken through and we might stand a chance to bear down on the enemy flank. On the hand, Paul’s elephants have been more successful and destroyed a pike block, but they are looking less than healthy.

    I was fortunate to overcome the first elephant which them rampaged into the one behind it, leaving it open to further harm from which I duly obliged giving it the coup de grace. On my left my remaining cavalry are trying to contain the enemy cavalry. However, my Thracians have the enemy camp in its sights.

    With better command dice I would have been home and dry, but alas before I could exploit my success my cavalry were overwhelmed and the flanks of my pikes were exposed and attacked by cavalry.

    Outcome

    A win for the Alexandrians, by 16 to 23. A much closer fight than the last which could have gone either way. We both agreed that the initial combat of the scythed chariot rather set the tone for the battle. If that had gone by way it might well have been a different outcome!

    Lessons Learnt

  • Although it was not a winning outcome the army design seemed to work well.
  • Scythed chariots are definitely a one-hit wonder, but for 3 points and no impact on army cohesion they are certainly something worth using in to use a few points.
  • ADLG - Game Report 108

    Anglo-Saxons (151) vs Tribal Mongols (178)

    So finally, I finished my first 28mm Army ready for Warfare 2023. And as promised the first game for them was against Paul and his Tribal Mongol horde. My army was based around two Saxon commands of heavy impetuous swordsmen, with the flank protected by our gallant, but very unreliable Welsh allies.

    The army presents a very imposing shield wall when deployed.

    Once I rolled a 1 for the allied general, who became hesitant, Paul made every effort to avoid getting within 4UD of him! His entire army started to gravitate to my right flank.

    In order to make a game of it I decided that as previously I needed to use the weight of number s to try and swing the battle field counter clockwise and drive the Mongols from the battlefield. Here is a little known tweak in the rules. We all think that impetuous foot do not have to charge mounted. Hence what is my problem, I should just keep walking forward to drive them away. Wrong, what the rule says is that you don’t have to charge the front edge of mounted, but therefore you do have to charge the rear edge of mounted!!

    The Mongols exposed their rears which I was forced to charge, because I didn’t have enough command points to hold them back. Moreover, every time I did try and bring them to battle they evaded, consequently my line started to become less coherent and expose gaps.

    And when we did come into contact the dice gods deserted me and with it what should have been a reasonable chance for some payback.

    Boyed by his success the Mongols didn’t evade the next charge and with the cumulative effect of their bows started to increase the Saxon pain.

    The line has become even more fragmented and the Mongols have started to exploit the gaps they are creating.

    Finally, the Mongols breakthrough in the centre and put the Saxon’s out of their misery. And the Welsh allies never came into battle.

    Outcome

    A huge Anglo-Saxon defeat, and a game of only marginally enjoyability – for both of us.

    Lessons Learnt

  • An army redesign needed.
  • A battle where the challenges with using included generals was very clearly exposed.
  • ADLG - Game Report 107

    Low Countries (243) vs Ottoman Turks (261)

    Paul wanted to get some practice in with his Turks before a forthcoming competition. I volunteered to be his tethered goat with my Flemish army, a broadly historical opponent. I decided to use the same army as I had used previously against Iain. However, in this case given that I was confronting a largely mounted Army I decided to dismount less of my knights.

    On balance I am not sure that going out to meet the enemy was such a good idea. Importantly moving my knights to the flank while prudent to help protect it, went further than perhaps it should have.

    Consequently, I left the typical gap for Paul’s marauding light cavalry to get around and behind my flank. As for the ability of my bows to bring down the mounted bows they were opposed by, well let’s just say that I should have provided them with some bolts for their crossbows!

    As you can see the Knights have got themselves into a nice little pickle. Their lack of mobility compared to the mobility of heavy and medium cavalry leaves them at a distinct disadvantage!

    Once again the mobility of the heavy cavalry allows them to disengage at will. My line in the centre seems to be relatively coherent, but as always the flanks are less so. It will only be a little while before the remaining knights are destroyed.

    And so it was to be. I needed to try to gain something from the battle and therefore the infantry went into pursuit mode to see of we could either pin some cavalry down to combat or at least drive them from the table.

    However, once the battlefield becomes fragmented the greater mobility of the cavalry comes into its own. And of course lack of command dice does not help when you are trying to close of the approach of the enemy light cavalry from your camp!

    Outcome

    A win for Paul by 9 to 22, and a much better game than the last one we had.

    Lessons Learnt

  • Do not expect Knights to out-manoeuvre Cavalry; retain them for counterattacks.
  • A better defensive battle plan is needed, if of course one can rally off cohesion hits from bow fire
  • ADLG - Game Report 138

    Seleucid(42) vs Aramean(74) I had time for one quick game, and I now hat Tony is a quick player! So onto battle with a relatively historica...