ADLG - Game Report 187

Anglo-Danish (180) vs Vikings (155)

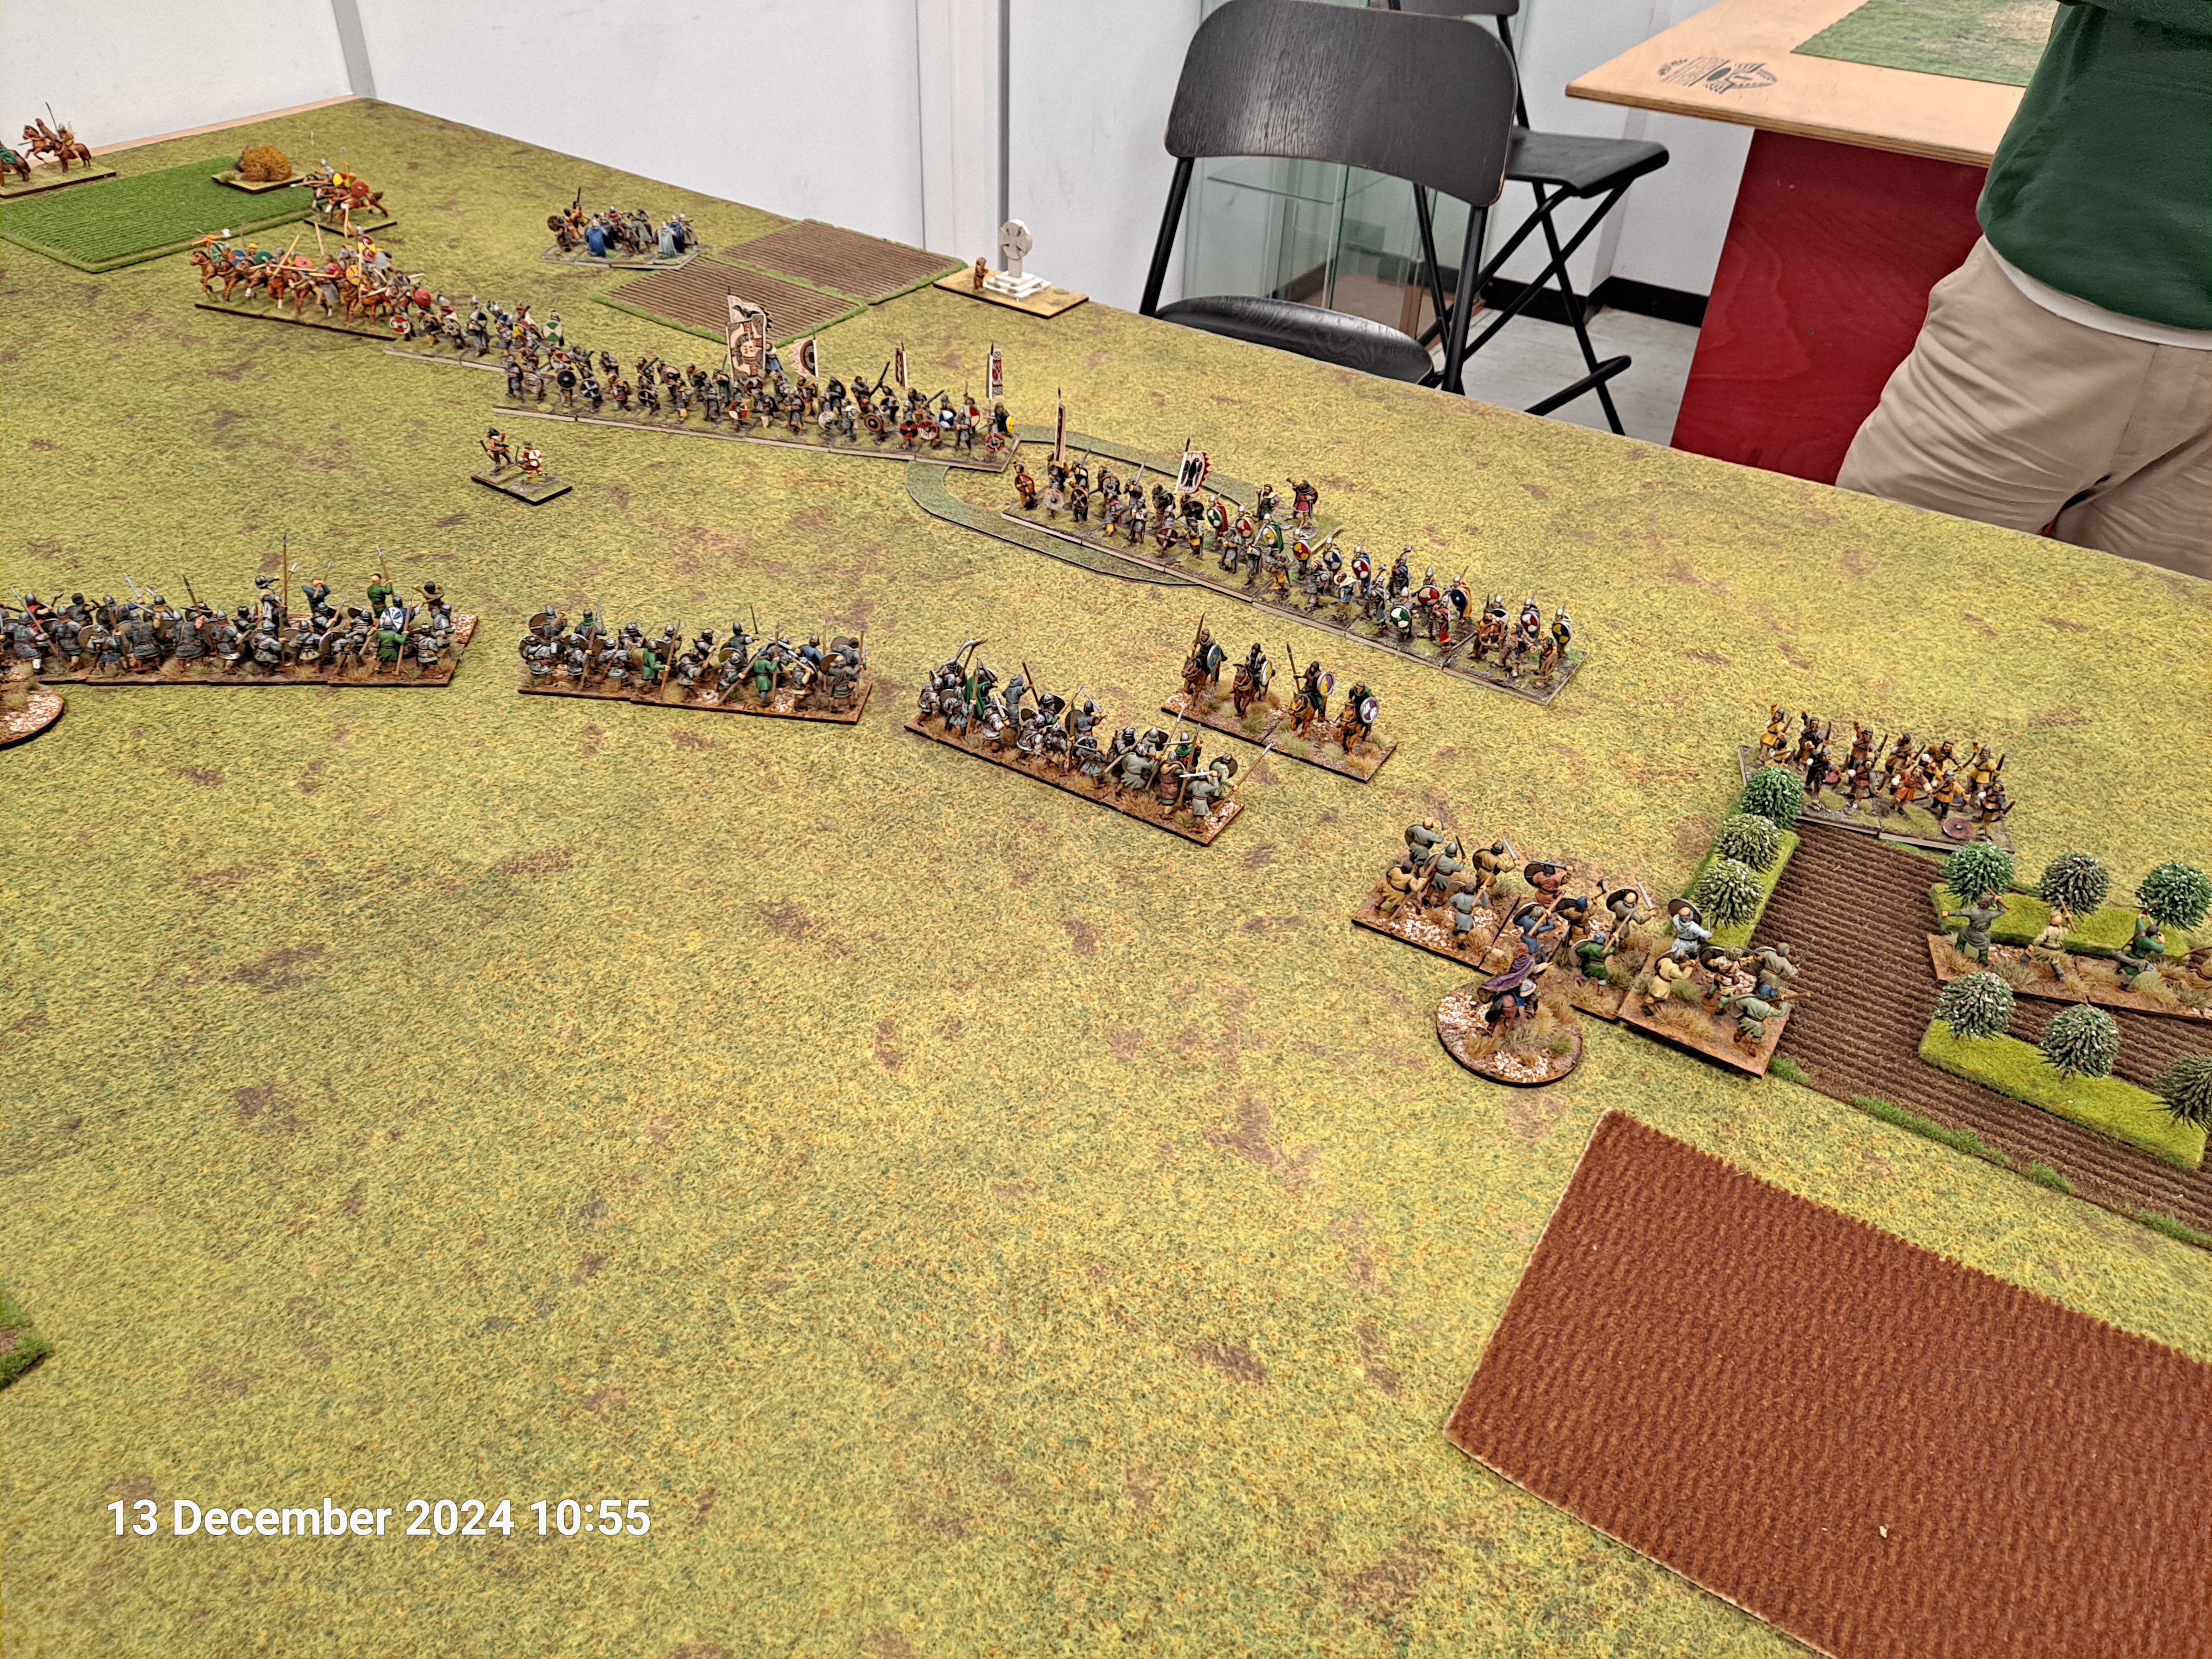
Back from Brixham, we decided to meet at Entoyment for a mid-week round-robin competition. I took along my Anglo-Danes as they hadn’t even been unpacked yet and therefore were an ideal period match for Mark’s Vikings with Breton Allies. He invited me to attack in the plains, and I obliged by placing my cavalry on the right with the shield wall in the centre and the Welsh Allies out on the right in the rough ground. The Anglo Danes advanced on the right refusing their left.

The first target for the Welsh was a small group of Bowmen entering the plantation. In front of the Vikings the Welsh Light Cavalry have exposed their rear to entice the Vikings to charge.

I didn’t need to entice the Vikings to charge, they charged anyway. The Welsh are committed and seem to be prevailing against the Bowmen and also against the Viking warriors. The Shield wall is currently holding and with luck if the Welsh prevail, they might sweep down the enemy line from the right to the left.

Indeed the Welsh are prevailing but they have a unit of Heavy swordsmen to clear out of the way first. Although there are gaps appearing along the enemy battle line, the result is far from certain as casualties amongst the shield wall increase. On the left the Anglo-Danish cavalry and Norman Knights are ready for the mounted showdown.

Both shield walls start to crumble and become fragmented. They key would be whose command and control can recover the situation the quickest and press on to the second phase of the battle. On the left one of the Knights has been destroyed wile the other pursues recklessly forward.

The Anglo-Danish command fails to rally the situation In the centre and the fights develop piecemeal. The reckless Knight has been destroyed and the remainder of the cavalry are looking less than healthy.

Outcome

A win for the Vikings by inflicting 23 hits to the Anglo-Danes and receiving 23 to their 25! We traded blow for blow throughout it was so close to being a mutually assured destruction.

Lessons Learnt

  • Recommend keeping the impetuous Norman Knights on the outer flank so that when they exploit their success they cannot be surrounded.
  • Bolt Action - Game Report 37

    Moro River Campaign Dec 1943

    Introduction

    Flush with the excitement of his Christmas present of the latest version of the Bolt Action Rules, Kevin wanted a game to try his hand and of course I was pleased to oblige. The date was set, and he decided to build us some nice Italianesque terrain to fight over. The scenario we rolled for was:

  • Victory Conditions – Hold Until Relieved
  • Deployment Zones – Quarters
  • Deployment Type – Prepared Positions (we decided to rule out the “Fog of War” option
  • I would be using the British and another outing for 9 Platoon, C company of the 1st Battalion of the Duke of Glendon’s Light Infantry (1DOG). For those who may not be familiar with tis fictional British infantry regiment, it features in the classic, and I do mean classic, WW2 war movie “The Way Ahead” starring David Niven.

    Situation

    The 8th Army have been advancing up the east coast of Italy after their landing at the foot of Italy in Operation Baytown. The Germans have been fighting a successful delaying action as they retire in good order defending every natural barrier they can. 8th Army’s goal was to punch through the German Winter Line on the Moro River and advance on Rome.

    In a preparatory diversionary operation in support of V (BR) Corps plan to cross the Moro river the Corps Commander directed that a number of key positions should be seized and held on the. 1DOG was ordered to seize and hold a number of key objectives to the west with the goal of attracting enemy armour tactical reserves away from the main operation.

    Enemy Forces

    The German 90th Panzer Grenadier Division was in the line, with significant armoured reserves based on Panzer Grenadiers supported by tanks and half tracks.

    Friendly Forces

    9 Platoon of C Coy would be leading with their 3 sections, and they would be supported by an Forward Observation Officer (FOO) to provide artillery support, a Mortar section of two 3 inch mortars, a sniper team from the Battalion Sniper Section, and a Sherman and Humber MkIII armoured support from 3rd Hussars of 9th Armoured Brigade.

    Mission

    9 Platoon is to secure the village of San Gelato and hold it.

    Post Mission Report

    The Platoon Commander brought up two infantry sections and the mortar sections as soon as possible to the outskirts of the village. The Humber mkIII provided close support to the advance into the village. The Mortar Spotter and already infiltrated in the wood and a close view of the objective. Additionally, the FOO and sniper team had forward deployed to the top floor of the two story building.

    The Germans had detected the advance and were prepared to contest the British occupation of San Gelato. Their Panzer Grenadiers were supported by a half-track with a light anti-tank gun, and their sniper team. The sniper team detected the sunlight reflecting of the FOO’s binos as the FOO was preparing his initial fire orders; orders he never delivered. The British were no longer able to call for artillery support.

    While 2 Section provided overwatch, 1 Section were deployed inside the ground floor of the building to protect them from the fire from the half-track. The sniper team on the top floor also took casualties from fire but was able to provide suppressive fire to force the Germans into cover.

    The Mortar section was brought under direct fire and one tube was destroyed, the other taking casualties. However, the timely arrival of the Sherman from 3rd Hussars and a Wasp from 237th Field Company, Royal Engineers arrived to provide timely fire support.

    Further German armoured reinforcements arrived in the shape of a PzIV. Both the Humber and Sherman manoeuvred around the rear of the church to flank the enemy tank. They were unable to disable it, but they did manage to drive it off, at this stage both sides were trying to press their case towards the objective but neither side was able to make significant progress.

    2 Section had advanced into the village outbuildings using the hard cover to protect them from enemy fire. 3 Section arrived to try and secure the woods to ambush the enemy. However, by this time the enemy reinforcements were arriving en masse with another half-track with infantry to press home their attack.

    The Wasp was brought forward and was able to close and destroy the half-track. Unfortunately, it ran out of fuel and was sent back behind the village to protect it. The PzIV was able to rally and to continue its attempt to encircle the village, and to play cat and mouse with the Humber and the Sherman.

    3 Section abandoned the wood (Fubar) but were able to rally before they left the battlefield.

    The failure of 3 Section to hold the wood as emboldened the Panzer Grenadiers to advance to support the half track which has made it to the objective. Fortunately, the enemy firepower was reduced by the sniper team taking out the truck as it tried to join the attack.

    The Humber came forward to engage the enemy half-track and destroyed it only to be taken out be a Panzer Grenadier with a Panzerfaust.

    The battle on who would control the objective. 1 Section launched an assault on the Germans holding the objective but were destroyed, and in a last throw of the dice the Germans decided to counter attack 2 Section in the outbuildings and manged to overwhelm them despite the presence of the Sherman.

    Outcome

    A German win on the last pull of the last German dice from the bag! A great game that was won by 2 dice draws from the bag:

  • By the Germans by pulling the first dice from the bag (for the German sniper to destroy the FOO)
  • And the last dice of the game to assault and overwhelm 2 Section in the building.
  • ADLG - Game Report 186

    Anglo-Danish (180) vs Scots Isles and Highlanders (187)

    Onto the final round of five games. I was facing William’s Scots and Islanders. A brightly coloured army with an abundance of standards and lots of two handed cutting weapons to confront my spears. For the third game in a row, I was defending in the plains. And once again I placed the Welsh allies on the left in the rough ground. With the primary shield wall command in the centre, and the CinC’s command with the Mounted Huscarls, and Knights, on the right, with the Knights on the farthest right wing.

    We advanced to meet the enemy. In doing so I decided to refuse the right and make my main effort in the centre, and with that in mind I moved the Norman Knights from the right to support the centre.

    The Welsh Allies light troops have turned the enemy right flank, and have joined with the main line to support the effort of the shield wall. Enemy bow fire continues to disrupt the advance of the Knights.

    In the centre the Mounted Huscarls have broken through, but the Scots bows have held the Knights (isn’t that always the way!). In the centre the lines of battle meet and start to inflict wounds on each other. Meanwhile a tardy advance of the Scots left has failed to keep pace with the main battle and will not contribute much to the battle.

    Outcome

    A win for the Anglo-Danes as the staying power of the Heavy spearmen overcomes the Scots Medium Swordsmen to win by inflicting 25 hits and only receiving 12.

    Overall for the weekend I came away with two wins, two draws and one loss for a mid-table finish!

    Lessons Learnt

  • The one take away from the weekend was that as useful as the Knights were, they needed to be in the right place to effect the battle, as they were difficult to reposition.
  • ADLG - Game Report 185

    Anglo-Danish (180) vs Feudal German (191)

    Day two of the Devonian Classic, and I am faced with Don’s Feudal Germans where I was invited to defend in the Plains. With a little variety I placed my Cavalry command in the centre with the shield wall on the right flank ready to wheel to the left to confront the Germans. I placed the Welsh Allies out on the left in some rough going to hold that flank.

    The Germans started to move their right flank to defend the gap between the fields. It was going to have to be the Anglo Danes who would need to risk attacking to secure a result.

    The Anglo-Danish cavalry provided a useful reserve and flank protection for the shield wall. Some irritating German light troops have forced the right flank through the gully and need to be dealt with. Meanwhile the Norman Knights are being held back as much as possible to avoid them rashly charging into contact.

    Battle is joined, and the pain is shared along the line, with the German halberdiers making short work on the Ango-Danish spears.

    Outcome

    A rewarding drawn game with the Anglo-Danes inflicting 19 hits on the Germans (they remained 6 hits away from breaking for some time) and only receiving 12 in return.

    Lessons Learnt

  • I should have moved the light infantry from the centre to the right much earlier to protect the right flank of the shield wall.
  • Sharpe Practice - Game Report 2

    A further encounter in 1809 Kevin and I decided that we needed a break from ADLG and CoC so a mutual decision to enter the world of Sharpe ...