ADLG - Game Report 196

Seleucid (42) vs Classical Indians (79)

For the final pre-Beachhead warm-up and test game I fought Kevin’s Indians. An old foe that we were familiar with and had bested at least once before. For this match-up I brought out the 28mm Army in all its splendour, but would it perform as good as it looks.

Both of our armies were 3D printed and we had been sharing experiences of our learning experiences of 3D printing as we assembled our armies. If our elephants look the same, this is because they are. However, for mine I grafted onto the model some Greeks to replace the Indians!

The Scythed Chariot finally makes contact, but against the elephant, which did not go well for the Chariot.

However, the pikes and their supports were doing much better, and the odds were in their favour on that flank. Whereas the odds on the Greek right were less encouraging. Would the holding command be able to hold?

The Thureophoroi on the right flank of the pikes has done exceedingly well in severely damaging the Indian 2 handed cutters! While the pikes for their part continue to close in for the kill. On the Grek right the holding action is delaying the Indians.

The Greek right has done its job in buying time for the pikes to come into contact. Especially the Thureophoroi who gave their all once the Indian Elephant conformed to them! However, with the pikes turning the Indian’s right and preparing to move down the line the battle swings in favour of the Greeks.

Outcome

A win for the Greek’s by 25 to 21 with the Greek’s one hit from breaking themselves.

Lessons Learnt

  • The question of whether the Army was going to be large enough to sustain losses and win would come back to haunt me at Beachhead.
  • Despite the figures being 3D printed with relatively brittle resin, we only had very minor breakage of our figures during and after the game; they are robust enough for battle even with dice flying across the board.
  • ADLG - Game Report 195

    Seleucid (42) vs Seleucid (42)

    After a bit of discussion with Kevin and a review of other Seleucid orbats from the hive mind provided by the ADLG Wiki of the Madaxeman, I put together a revised orbat for the Seleucid army. This one was based on two approximately equal commands of pikes, elephants and peltasts, and a smaller cavalry command. First offer of battle for this revised orbat came from Robin who put out a Seleucid enemy for me to face – a prophetic choice as the competition at Beachhead would be replete with Greek pike armies!

    I was attacking in the plain. I deployed the weak cavalry command on the right with its two Heavy Cavalry, a Light Cavalry and two light infantry. In the centre was the CinC with his three pikes, elephants and two peltasts, and a brace of Heavy and Light Cavalry, along with a Scythed Chariot for its shock value. On the left the composition was similar to the centre but lacked the Light Cavalry and the Scythed Chariot.

    The line advanced as best as it could. In the centre the Light Cavalry are trying to protect the chariot from missile fire. However, despite the CinC’s brilliance in the centre he lacked the command points to adequately manoeuvre his command the way his deployment demanded.

    The impetuosity of the Scythed Chariot demanded that it charge the enemy light troops which of course won the combat! As the lines contact each other the CinC’s pikes have come off a decidedly second best! However, on the right the Thracians have destroyed their opponent and are now in a position to support the cavalry, if required, to support the cavalry which have flanked the enemy elephant.

    The enemy elephant avoids disaster against my Cavalry and sound beats them, even with my Thracians to their rear. At the same time the other enemy elephant has destroyed my Elephant and which is now capable of manoeuvring against the Thracians rear. In the centre one of the CinC’s pikes has been destroyed but the Argyraspids have destroyed their opponent and have now wheeled on to the flank of another pike unit.

    Outcome

    A win for Robin’s Seleucids by 22 to 17. On reflection this could have gone either way.

    Lessons Learnt

  • The CinC needs to get lucky on his die rolls to be able to command all of these units in the first round.
  • ADLG - Game Report 194

    Ostrogoth (95) vs Patrician Roman (88)

    For the final game of the day I was facing Mark’s Patrician Romans. Once again I was defending in the plains and decided I needed to have a secure flank by successfully deploying a coastline. The deployment was the same as against Tony’s Armenian’s and fortunately there was another handily placed field for the Bowmen to use as their refuge and to establish Fire Base Alpha.

    With the coastline and the width of the Ostrogothic line this was going to be a battle of little subtlety.

    Contact! So far the Ostrogothic Cavalry have made inroads into the Roman cavalry and there are now gaps on the left and in the centre. The latter of which the Huns are getting ready to exploit. The infantry are continuing to advance.

    On the left the Roman Cavalry have been effectively beaten, which has opened up front for the Ostrogoths to advance into the rear and flank the enemy. The attack against the Roman Foederati has gone well with losses inflicted. On the right Fire Base Alpha has already destroyed the Roman Bowmen and has now started to inflict casualties on the Auxilia.

    Outcome

    A win for the Ostrogoths by inflicting 23 and only receiving 10 in return. This gave a day’s result of 2 wins and a loss, to allow me to finish 5th equal out of 26; possibly my best result for a while!

    Lessons Learnt

  • A potential validation of how to field 4 bowmen units in a command?
  • ADLG - Game Report 193

    Ostrogoth (95) vs Armenian (71)

    For the second game I was up against Tony’s Armenians. For those in the know, the Armenian Cavalry with the raised spears are in fact in this period for the theme of the competition Heavy Cavalry and not Cataphracts (thank goodness). I decided this time, as I was defending in the plains, to try and anchor my Bowmen in terrain that would suit them and provide some protection. Meanwhile the two cavalry wings were deployed in the centre and left. Initially in column ready to deploy as required in response to the enemy.

    The Ostrogothic cavalry wings have been sent to the left to provide greater concentration against that wing of the Armenians. Meanwhile the Bows have secured the defensive terrain, with the heavy infantry to protect their flank. Fortunately, the Ostrogothic camp is fortified and therefore can stand on its own if required.

    On the left we have achieved the desired concentration of effort. While on the right the Ostrogothic infantry stand ready to face the Armenian heavy cavalry supported by the bows.

    On the left the Armenian Horse Archers have severly damaged the left wing of Ostrogothic cavalry. However, the cavalry in the centre have performed better attacking uphill against the enemy javelinmen and bows. The greatest success is with the Ostrogothic infantry which have enticed the enemy cavalry to charge and are which are now paying the price for their boldness being assailed in the front and in the flank. The Ostrogothic included General needs all the support he can get!

    The support provided to the Ostrogothic Infantry Commander allowed him to survice only for him to be caught in the rear by the enemy light cavalry. Despite this, his command has destroyed all before him. On the left the Ostrogothic cavalry are refusing to give ground and are continuing to fight on.

    The Ostrogothic cavalry on the left and centre continue to tie up a lot of enemy troops. However the Infantry has now regrouped and is advancing on the hill.

    Outcome

    An Ostrogothic victory by inflicting 25 and losing 21. A close won victory with the Ostrogoths only 4 away from breaking!

    Lessons Learnt

  • The deployment worked well, and the Bowmen provided excellent support to the infantry line.
  • ADLG - Game Report 192

    Ostrogoth (95) vs African Vandals (142)

    With the Ostrogoths all prepped and ready it was off to Oxford for the One-Day competition. The theme for the day was the Age of Aetius, with any valid army list between 390 and 454AD. Actually, this theme was ideal for me as it gave me the impetus to fill a missing link in the ADLG timeline of the armies I could field. My first battle was against Gordon’s African Vandals, and it was my decision to attack in the plains. I decided to keep a similar deployment to that which I had used on the last outing, with the cavalry on the wings and the infantry in the centre. In retrospect not a good decision.

    I placed the main effort on the right with the infantry line supporting the right hand cavalry wing. Meanwhile the Vandals started their move to the right.

    On the right the cavalry wing continues to close with the enemy while the infantry come up in support against the enemy line of infantry. On the left the picture doesn’t tell the whole story. I used my Huns to engage some marauding Moors, only for them to be caught in the flank by other Moors, which allowed the Moors to come behind and attack my cavalry line in the rear!

    Henceforth with this debacle behind us it was up to the centre and right to see if they could redeem the error on the left. Perhaps a vail hope, the Cavalry have managed to destroy one of the vandal cavalry units, but the infantry has suffered a loss on contact to the Vandal infantry.

    The remnants of the left wing continue to try and delay the inevitable. Meanwhile in the centre the Ostrogothic infantry have flanked a Vandal Infantry unit, but it refuses to succumb to the attack. I have left the other two infantry advance to the camp, as I might need the benefit of sacking the enemy camp.

    Out on the left the last remaining Ostrogothic cavalry are refusing to lay down their arms. While the bowmen sent to support them have ow been flanked by the moors. In the centre we finally routed the stubborn Vandal infantry, but even more impressively a unit of Bowmen have inflicted a hit on another vandal infantry unit. The right wing of cavalry has been reduced to two effective units.

    Outcome

    We were Vandalised by 25 losses to only inflicting 13.

    Lessons Learnt

  • The loss of the Huns on the left early in the game was a game changer and which could have been prevented with a little more thought.
  • Once again the deployment of the bowmen didn’t allow them to contribute significantly to the battle.
  • ADLG - Game Report 191

    Seleucid (42) vs Triumvirate Roman (83)

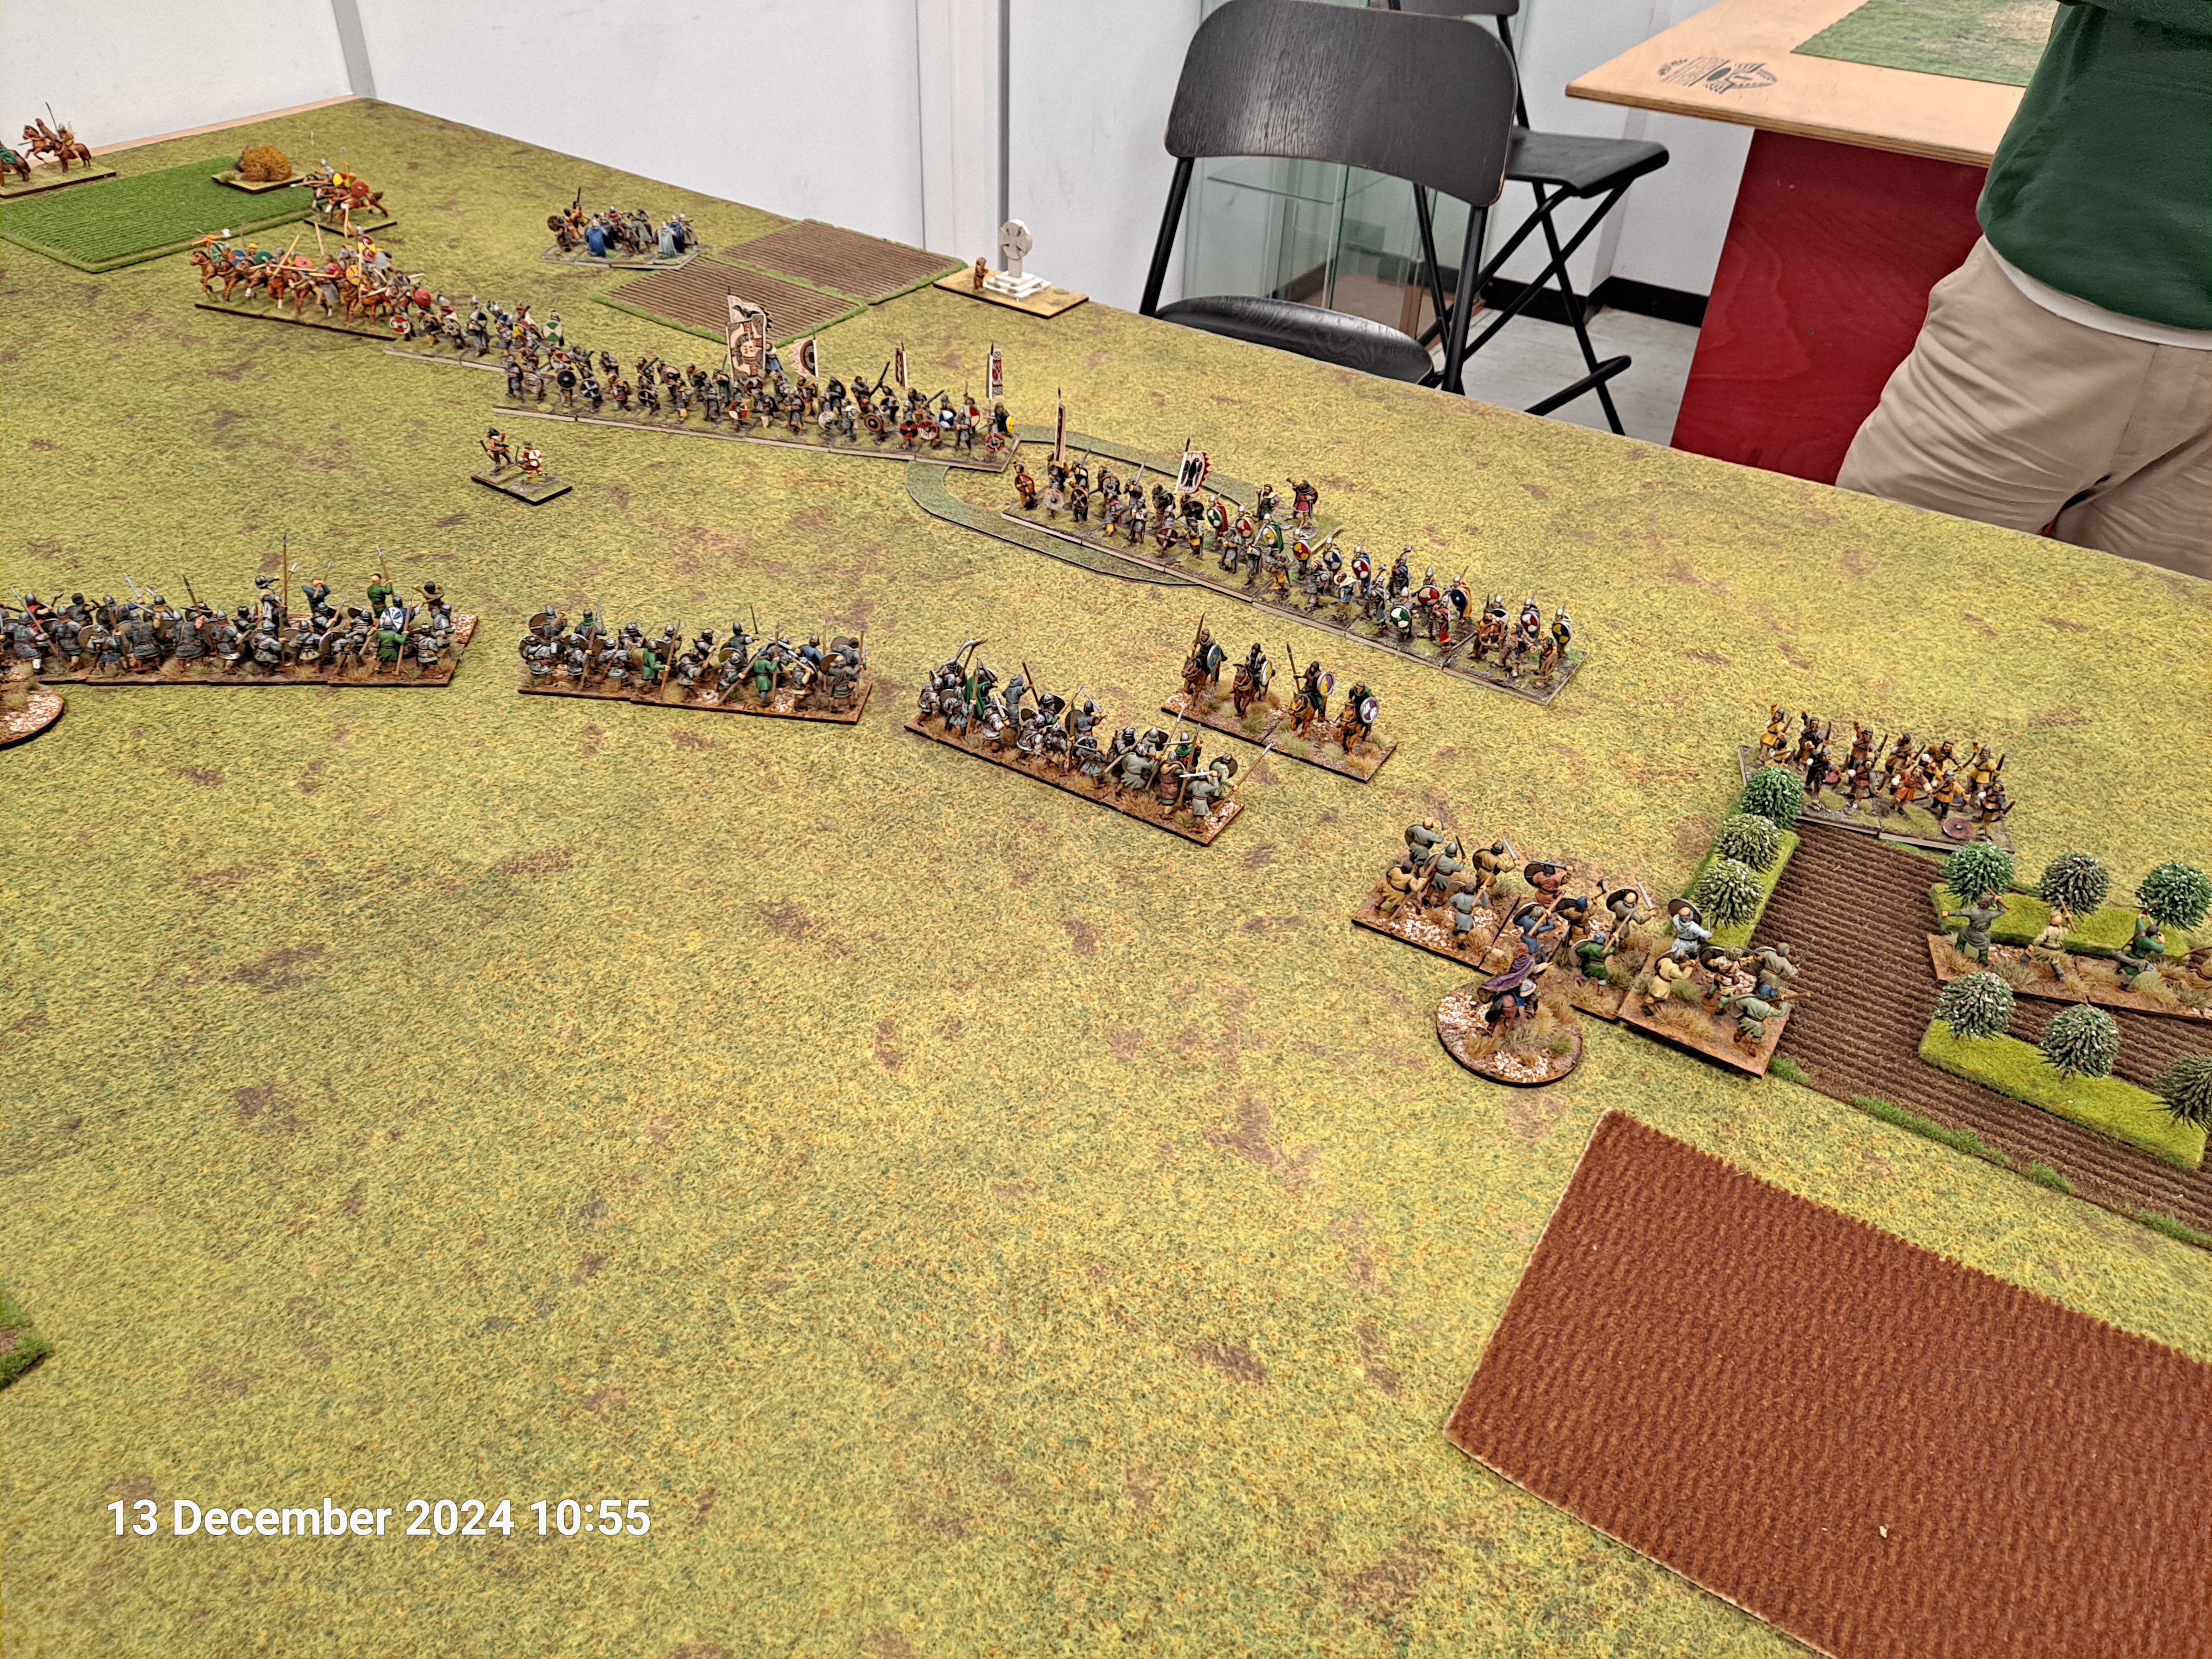
    For the final game of the day I brought out my Seleucids to fight Robins Triumvirate Romans, an army I had fought before. So, this would be another test of the army design before Beachhead. Seleucus deployed with the elephant command on the left, cavalry on the right way, with a solid phalanx of infantry in the middle. The Scythed Chariot was on the right hoping to get into contact before Robin’s Bowman did “The Dirty” on them – again.

    The chariot managed to avoid being killed by enemy bow fire. The enemy bow fire from their light troops was confined to engaging the Greek light cavalry. Behind them a line of Pikes are moving forward as fast as they can to engage the Roman Legionaries. On the right the Greek cavalry remained in support ready to exploit any opportunities for attack. It all depends, of course, on what the Roman Cavalry is trying to do in manoeuvring round from there right. The elephants and supporting Thracians are moving forward to bring the Roman Legionaries into contact.

    The Greeks have finally persuaded the Roman legionaries to come out to fight against the Pikes. Behind them the Roman Cavalry is still trying to manoeuvre itself out of the position onto their left flank to face off against the Greek Cavalry. The elephant supported by the Thracians and Peltasts are continuing their advance and now supported by the Scythed Chariot. The Chariot managed to persuade the Roman Light Cavalry to evade contact.

    All along the line contact has been made! The Elephants against the legionaries haven't done as well as one would wish. However the Scythed Chariot has inflicted losses on the Roman Legionary unit facing it! In the centre one of the Pike blocks has managed to penetrate the line and it is now able to come into contact with the Legionary flank. In the centre there is a heavy contact between the Pikes and the Legionaries, with honours broadly even. The Greek Cavalry is still waiting for the Roman Cavalry.

    The Roman Cavalry is getting closer but not close enough. However, to their flank their Legionary colleagues have managed to destroy a Pike block and have lapped out and trying to push the line forward. While on the right of these Legionaries the Greek pike blocks are manoeuvring to bring pressure on the enemy centre. On the Greek left the Roman Legionaries are continuing to advance after destroying the Thracian Peltast and one of the elephants. The remaining Peltast and the remaining elephant are continuing their advance into the enemy position.

    We have finally made contact with the Roman Cavalry and after the wait we seem to have the upper hand in the combat. In the centre the pike blocks have now realigned themselves to face off against the Roman Legionaries of the Roman right. The final elephant was destroyed by Roman Legionaries but now they've stopped because the Peltasts withdrew into terrain which the Roman Legionaries didn’t like.

    The Roman Legionaries seem to have worked out how to attack, and have actually made some significant progress on the centre left against two of the pike blocks, both of which are hanging on for dear life. In the centre the Auxiliary Gaulish Cavalry have fixed in place two pike blocks. But on the right the Greek Cavalry are winning the fight against the Roman Cavalry, and may now be in a position to defeat them entirely.

    Outcome

    A Seleucid win by breaking the Romans on 21 and suffering 21 in return!

    Lessons Learnt

  • In spite of the win I need to explore whether this Army design is fit for purpose.
  • ADLG - Game Report 190

    Ostrogoth (95) vs Kushan (107)

    For the second game of the day I decided to bring out the Ostrogoths. I had finished these very recently and they were ready for a try out before the Oxford one day event at the end of January. However, I'm not sure that Paul’s Kushans were the ideal opponent for the Ostrogoths in their first meeting. Nevertheless, my deployed with the infantry in centre and the cavalry out on the wings. Everyone was impetuous apart from the bowmen, the camp is fortified.

    On the right flank. The cavalry successfully manoeuvred to avoid hitting the elephant directly in the face. Well, despite this good fortune, the cavalry didn't come off entirely scot free in the combat round. In the centre. Infantry have manoeuvred and split their line. With three units of heavy infantry and bowman facing the medium cavalry, while the remainder move to the left to support the left wing against the Kushan’s Cataphracts.

    As one might have predicted, the heavy cavalry on the left did not do well against the Kushan Cataphracts. There are now lots of gaps where the Kushans simply blew my cavalry away. In the centre the Kushan Medium Cavalry have skillfully avoided the infantry and now advancing towards the rear of the remaining cavalry on the right wing.

    Inevitably the Medium Cavalry attacked the Bowman and rolled straight through them leaving in the centre a gaping hole. On the left the Cataphracts are trying to mop up the remaining cavalry, and will be soon engaging the remaining infantry that was sent over to support them. On the right we're now down to 2 remaining cavalry units to face the Kushan horde they aren't going to survive long either.

    Outcome

    A Kushan win by 25 to 13.

    Lessons Learnt

  • Not the ideal enemy to confront on the first outing.
  • The infantry line was relatively sound, but the flanks protected by the Bowmen were weak and unable to really support anyone.
  • The right wing attack against the enemy left was in principle a sound idea but perhaps could have been executed better.
  • ADLG - Game Report 189

    Seleucid (42) vs Classical Indians (79)

    Two weeks later we were all back for another day’s gaming at Entoyment as a post Christmas gift to ourselves. For the first game I decided to try a further refinement on the Beachhead theme by bringing the Seleucids out to play against Kevin’s Indians (which he would be using at Beachhead.) The orbat was subtly different from previously with a left flank with a mix of Cavalry and pikes, a centre of all pikes and an included General, and once again a right flank of Elephants and supports. However, I think the terrain was simpler and better suited for the army.

    The Indians attached in echelon with their right leading and we responded in kind. The Chariot has made contact and has survived the initial contact.

    On my left the leading Indian elephant has trampled the opposing pike block beneath its feet in one round of combat. Leaving the rest of the left looking fragile. In the centre we avoided the elephant in the first round of combat and after the chariots contact rolled over the enemy with a pike block. However, the remaining pikes are less than healthy. On the right I foolishly left the wounded lights behind and therefore failed to protect my elephant from bow fire on the way into the attack. On our far right there is an irritating Indian Cavalry unit waiting to pounce on our flank, irrespective of the potential benefits of the Peltasts trying to block the way.

    The Greek cavalry are playing hard to get and refusing to charge the enemy, while the Pike block pursues in to the Indian centre. The central block of pikes is now at 50% with open flanks. On the right the Greek Elephants have dispersed the Indian light troops but this is unlikely to be of great value to the cause.

    Greek casualties are mounting. As expected on the right the Indian Cavalry unit has made its presence felt and is now in a position to secure the demise of the remaining Greek Elephant.

    Outcome

    An Indian win by 10 to 23.

    Lessons Learnt

  • The arguments for a different orbat are getting louder with each game. Research is needed.
  • I am not sure Javelinmen, despite their pretty shields, are worth it in penny packets: a lot of them might make a difference on a flank with rough terrain.
  • ADLG - Game Report 188

    Ptolemaic (43) vs Kushans (107)

    After a narrow loss to the Vikings, I brough out a trial for the Ptolemaic, in their potential fighting orbat (Order of Battle – for those not aux fait for the abbreviation) for Beachead in February against Paul’s Kushans. The theme for the competition is the “March of the Funnies” with an army that must have at least 2 camels, 2 elephants or 2 war wagons. Which all means for me that my Army must have elephants!

    As is oft the case I rather messed the plan up and was caught between ideas and in the end fell between two stools (mixing my metaphors). I failed to anchor myself to the marsh on the left and protect the left flank, and over fixated on the two hills. Hence the early commitment of two Heavy cavalry to the flank of the pikes.

    To aggravate the error, I then started to move the pikes en column of march to the left, and decided to vacate the hills which the elephant secured. In doing so I exposed the Peltasts with their Javelins to try and hold off the enemy cavalry. I rather do this to myself rather too often.

    The pikes trundle slowly to the left, while the cavalry form in the centre. This only leaves some light cavalry to protect the left flank, if needed.

    Eventually the pikes line up against the Kushan Cataphracts. The elephants have been committed in an uphill battle, where they are looking for support from the cavalry on their left. The Peltasts protecting their flan are supported by Greek Cavalry, and at least we have caused some small casualties.

    One of my elephants has succumbed to its wounds, while the supporting troops and the rest of the right flank is a heartbeat away from crumbling.

    The right has crumbled while the Cataphracts move in to attack, with a well-placed Kushan cavalry unit moving through the marsh to outflank the line of pikes.

    Outcome

    A significant loss to the Ptolemaic by 22 to only inflicting 11.

    Lessons Learnt

  • Once again there was too much inviting terrain for me to decide to where to place my troops.
  • In retrospect this classical orbat, with troop types in specific commands, is what also causes tension when doing the plan; I didn’t have the right troops in any of the commands for any of the positions.
  • ADLG - Game Report 187

    Anglo-Danish (180) vs Vikings (155)

    Back from Brixham, we decided to meet at Entoyment for a mid-week round-robin competition. I took along my Anglo-Danes as they hadn’t even been unpacked yet and therefore were an ideal period match for Mark’s Vikings with Breton Allies. He invited me to attack in the plains, and I obliged by placing my cavalry on the right with the shield wall in the centre and the Welsh Allies out on the right in the rough ground. The Anglo Danes advanced on the right refusing their left.

    The first target for the Welsh was a small group of Bowmen entering the plantation. In front of the Vikings the Welsh Light Cavalry have exposed their rear to entice the Vikings to charge.

    I didn’t need to entice the Vikings to charge, they charged anyway. The Welsh are committed and seem to be prevailing against the Bowmen and also against the Viking warriors. The Shield wall is currently holding and with luck if the Welsh prevail, they might sweep down the enemy line from the right to the left.

    Indeed the Welsh are prevailing but they have a unit of Heavy swordsmen to clear out of the way first. Although there are gaps appearing along the enemy battle line, the result is far from certain as casualties amongst the shield wall increase. On the left the Anglo-Danish cavalry and Norman Knights are ready for the mounted showdown.

    Both shield walls start to crumble and become fragmented. They key would be whose command and control can recover the situation the quickest and press on to the second phase of the battle. On the left one of the Knights has been destroyed wile the other pursues recklessly forward.

    The Anglo-Danish command fails to rally the situation In the centre and the fights develop piecemeal. The reckless Knight has been destroyed and the remainder of the cavalry are looking less than healthy.

    Outcome

    A win for the Vikings by inflicting 23 hits to the Anglo-Danes and receiving 23 to their 25! We traded blow for blow throughout it was so close to being a mutually assured destruction.

    Lessons Learnt

  • Recommend keeping the impetuous Norman Knights on the outer flank so that when they exploit their success they cannot be surrounded.
  • ADLG - Game Report 207

    Ptolemaic (43) vs Warring States (80) One of the most important aspects of the day was that Tony was able to join us, and it was a pleasure...