ADLG - Game Report 117

Post-Roman Brits (146) vs Classical Indian(75)

This battle was going to be a challenge, I am not sure many of the Britto-Romans would have ever seen an elephant before. Moreover, Ian was known to be an exceptionally good player.

I decided to take a cautious approach by refusing my left and trying to get my own Cavalry around the right flank and behind the woods. However, the light cavalry after bumping the ambush have taken damage from the light infantry in the woods.
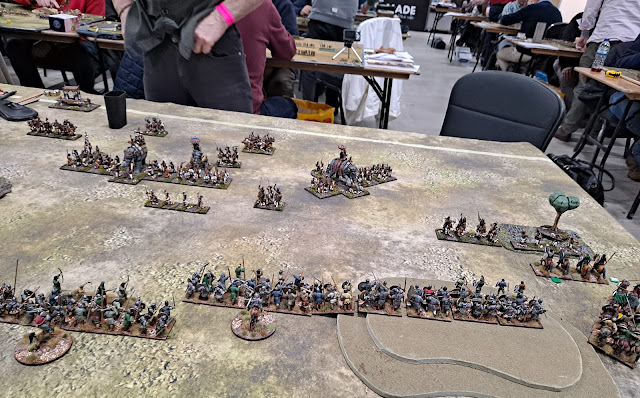
The shield wall has formed up using the woods to secure the right flank. The cavalry, led by their general are now starting to turn the right flank.

My turning movement on the right has forced the Indian commander to reorientate his left flank command to the threat. However, I am increasingly concerned as to whether I have enough strength on my left to defend against his movement against it.

I have started to clear the woods on the right. The key for me would be whether the enemy’s left would be exposed to my shield wall advancing on it; if that is, I decided to come out to support the cavalry.


My cavalry has been committed against the infantry supporting the elephant on the enemy’s left, but the combat has not been kind to me. Meanwhile the shield wall is now in position to defend itself.

The enemy elephant on the enemy’s left has broken off and has attacked my shield wall and broken through it. The cavalry are holding their own at the moment. Meanwhile elsewhere the overall cumulative effect of the Indian bow fire is causing cohesion hits sufficient to weaken the enemy before they come crashing in to perform the coup de grace.

Outcome

A win for the Indians by inflicting 26 to the 16 they received.

Lessons Learnt

  • I suppose one of the lessons would be to choose a better army to fight elephants, but in a competition one does one’s best with what one has chosen.
  • ADLG - Game Report 116

    Post-Roman Brits (146) vs Caledonian/Pictish (99)

    Onto the second game against another dark ages barbarian army, Mark’s Picts et al. Given the woods on the right I decided to use the left as my major axis of attack.

    The lines contact each other. Meanwhile I have the cavalry on the left in reserve to exploit any gaps I can create in the enemy line. However, despite my initial decision to force the enemy’s right, I have committed my main cavalry force to battle against what looks a juicy target in front of them.

    On the left the shield wall is in heavy contact with both sides taking some losses. On the right the cavalry has almost broken through with the chariots their next target.

    The enemy infantry line on the left has been broken, along with the centre and cavalry now forcing the enemy line apart.

    Outcome

    A win for the Britto-Romans by 29 to only suffering 14 in return.

    Lessons Learnt

  • Look for opportunities of pitting your better troops against the weaker opponents. It helps when they are medium infantry targets.
  • ADLG - Game Report 115

    Post-Roman Brits (146) vs Vikings (155)

    Onward, and hopefully upwards the Britto-Romans proceeded to do battle at the Farnborough Exhibition Centre, let loose the dogs of war at Warfare 2023 and raise the cry SHIELD WALL!

    First up was a battle against Luke’s Vikings, fortunately with the traders open for business Luke was able to procure some counters and dice to replace the ones he had forgotten – I was rather hoping he was given the dice that only rolled ones!

    Luke started by refusing his right flank, given that I had massed what cavalry I had against that flank.

    Despite my best intentions I wasn’t able to get enough command points to move as quickly or as far as I would like. The flank guard that Luke left out was a serious annoyance.

    Perhaps on balance I would have been better sacking the camp rather than trying to work along Luke’s flank. Even at this stage the main lines had yet to make contact.

    From the results I suffered in the combats you can guess that I wish the opposing lines had not made contact. On my left the annoying flank guard has been overcome, but by this stage I doubted if it would make much difference to the final outcome.

    From the rather depleted shield wall you can guess that my suspicion was correct and despite some small success my army was comprehensively broken by Luke’s Vikings.

    Outcome

    A win for the Vikings by 25 losses to the 18 I inflicted on them.

    Lessons Learnt

  • If one is around the flank one needs to be much more aggressive and adventurous.
  • ADLG - Game Report 114

    Post-Roman Brits (146) vs Normans (179)

    So, for one last time before Warfare Kevin and I managed to sneak in one more practice game with our chosen armies for the competition.

    For this battle I manged to have a secure right flank against the Norman Knights. My shield wall extended across my front with my Cavalry deployed on the left flank.

    My first decision was to with draw my own Cavalry into reserve behind the infantry. Meanwhile I have pushed some heavy infantry through the woods to secure the flanl with the light infantry on their right flank in Ambush.

    While the Normans slowly advanced, I assume waiting for me to get over ambitious, I moved the shield wall forward to cover from the woods to my left flank. I decided that my Light Cavalary could be better employed on the right flank.

    The Normans came forward to throw back my light infantry, but they manfully came back forward again after evading and regrouping. However, the Norman crossbows have started to inflict casualties on my infantry. On my right my Light Infantry have forced the Norman lights to withdraw.

    The Norman infantry in the centre have been thrown forward into battle. Meanwhile my Light infantry on the left have withdrawn behind the cavalry. On the right my Light Cavalry have managed to find their way through the woods to bring some pressure to bear on the enemy left flank.

    The Norman knights have engaged the left end of the shield wall and are inflicting some pain. Their infantry have delayed their advance, presumably they are waiting to see the outcome of the contests to their left and on the right. Where on the right the Light Cavalry are outmanoeuvring the more cumbersome impetuous Norman Knights.

    Although there seems to be stalemate on the left and in the centre, on the right the Light Cavalry have done sufficient to draw off a number of Norman Knights.

    The shield wall stands firm and has not been broken!

    Outcome

    A creditable draw inflicting 6 cohesion hits to the 14 we received.

    Lessons Learnt

  • Good choice of terrain helped!
  • A patient defensive approach was essential.
  • Sharpe Practice - Game Report 2

    A further encounter in 1809 Kevin and I decided that we needed a break from ADLG and CoC so a mutual decision to enter the world of Sharpe ...