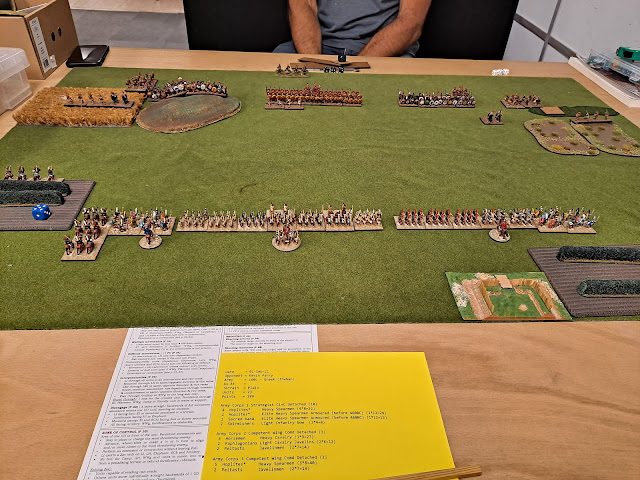
ADLG - Game Report 22

Republican Roman (53) vs Later Macedonians(45)

Returning to Bournemouth Paul invited me to a game to try out my newly won skills. He decided to field his later Macedonians, while I opted to field my Romans as Republicans. My army had 2 Corps all Hastates and Velites, and a smaller cavalry command.

On the left advance started well, whereas in the centre there was a bit of confusion as half the line failed to advance.

Fortunately, they caught up very quickly. But not before some Macedonians stopped my cavalry dead in their tracks.

I moved some infantry in to support the cavalry, who managed to destroy one of the Greek cavalry units. I threw the moors out on my flank while I released some heavy cavalry to support them. 

The Macedonian pike blocks of contact in my line, and have broken through. Where they haven't broken through they have created significant disorder.

On the right time making significant progress. Three units of Greek heavy cavalry have now been destroyed, along with a unit of heavy spears. with another unit of heavy Spearmen about to be destroyed. Despite the success on the flanks the crumbling of my centre was the death knell for my army.

Outcome

A defeat for the Republicans 22 to 19, but a great game!

Lessons Learnt

  • Another game where a reserve may have been useful
  • I think I could have employed the Light Infantry better, especially if I'd given them some javelins


ADLG - Game Report 21

Andalusian Arabs(133) vs  Post Roman British(146)

Onto my final opponent for the day, Richard Stone. I was up against the king of the Britons, Arthur himself.

I adopted a similar formation to my first battle; heavier cavalry to the left, lighter cavalry to the right and my heavy infantry in the centre. Once again, my command and control was good, and I closed the distance rapidly to engage is line of battle.

I had some success on the left. My light cavalry provided a sufficient distraction for my heavier cavalry to overwhelm the British. We managed to turn Richards right flank and tried to gain our first victory.

However, it was not to be. The left of my line of battle, took significant casualties. Even though I broke through at one portion of the line. On the right it's fairly equal, although one Bowman unit has been destroyed, it did sterling work before its sad demise.

Outcome

Despite the initial success it was a sad loss for the Arabs and my third for the day. 

On the plus side I did score another 17 ones which put me at the grand total of 56 and I won the prize for the most ones during the day. So point of fact, I didn't come away empty handed!

Lessons Learnt

  • I don't think I learnt many new lessons, as it was a fairly even battle.


ADLG - Game Report 20

Andalusian Arabs(133) vs  Tuareg(210)

My next opponent was Ted Tolson's Tuareg army. I was confronted with lots and lots of camels. I knew camels had an impact on horse in combat, but knowing and experiencing it are two different things.

All the terrain on the battlefield was concentrated on the right flank, with sand dunes and brush covered hills. I rather assumed that would be a relatively safe flank, I was to be firmly disabused of that notion as the game went on!

Our command and control was pretty good, and we closed the distance to engage rapidly. I think Ted's plan was to put me out my misery quickly. 

On the right you can see my first problem which was the brush proved no obstacle whatsoever to the light camelry.

Once we started to fight the melees I discovered how smelly camels can panic horses. Ted had some significant success in breaking through my cavalry lines, destroying several cavalry units and successfully lapping around to take others in the flank. Meanwhile his light cavalry seized the camp coma with another four point loss to me.

Outcome

A defeat for insert for the Arabs. well I picked up another 19’s to take me to total of 39 so far for the day.

Lessons Learnt

  • Pay attention to the terrain benefits some troop types have
  • this is one of those battles in which a reserve may have helped
  • Camels are a difficult opponent for cavalry


ADLG - Game Report 19

Andalusian Arabs(133) vs  Bedouin Dynasties(138)

So after my fight with the Rus it was on to the Autumn Invitational.

My first opponent was Dave Saunders, with an interesting choice of terrain; brush covered hills. My army list is below. As you can see, I've gone for two reasonably equal cavalry wings and a heavy infantry main body. This was the army for the entire event.


In this battle I decided place my heavier Cavalry on the left and my lighter cavalry on the right. David deployed an ambush on the brush covered hill to my left. I decided it would be quite useful to spring that ambush as quickly as possible and see if I could seize that hill.

I succeeded in seizing the hill. On the right my light cavalry have made a significant advance to try and disrupt any outflanking movements. Meanwhile the main body continues to advance.

On the left I sprung the ambush, there was no one there. This placed my javelinmen in a good position to throw javelins at his cavalry. This intervention in his line caused Dave a great deal of angst. In the centre my main body of heavy infantry are moving forward together and trying to protect their flanks at the same time. On the right the light cavalry have evaded.
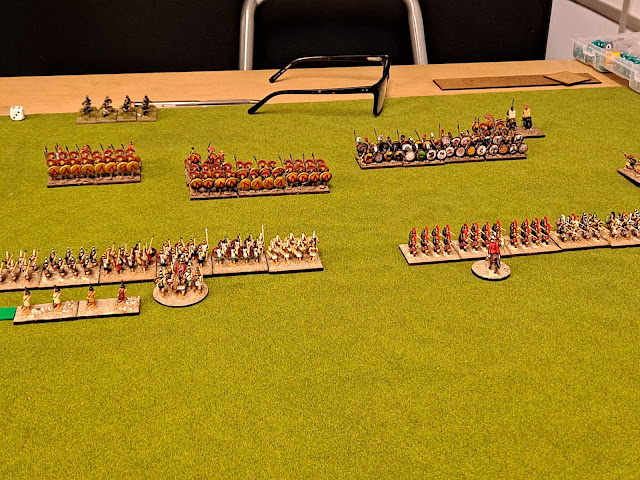
On my left my cavalry didn't perform up to expectations. On the right flank I've lost a heavy cavalryman and the light cavalry decided to stand and accept the attack; perhaps not my best move.

Outcome

A relatively close defeat for the Arabs. I also scored 20 1’s in my battle; hey good start for the prize for the most ones rolled in the day.

Lessons Learnt

  • A little less aggression, a little more caution on the right flank might have done me good service.
  • The ploy of springing the ambush and disrupting Dave’s line was a good result


ADLG - Game Report 18

North African Arab(132) vs Rus(165)

In preparation for the Autumn Invitational at the Central London War Game club I decided to seek an opponent for my Arab army on the Thursday before. Fortunately Stan came forward and offered to allow me to fight his Rus army. This would certainly be a new challenge for me.

I decided to field something slightly different, so I chose the North African Arabs, as well as a slightly different troop mix. .After all, I had painted lots of figures. Once Stan and placed his river on the table, which by the role was difficult terrain, I naturally decided to load up my cavalry on the left flank. I was also hoping to use my remaining lighter troops to cross the river and threaten his camp. we will see how that's announced at the end.

I committed the left flanks light cavalry as a diversion to draw off troops. This would give my cavalry advantage, also I hoped.

I committed the left flank light cavalry as a diversion to draw off troops. This would give my cavalry the advantage, I hoped.

My left flank light cavalry are holding their own. The cavalry are engaged on the left and with good grace they should overwhelm the enemy. Meanwhile on the right, my light cavalry have crossed the river and are advancing on the camp.

Battle is now joined in the centre and the right. And on the right it isn't looking good. My light cavalry have reached the camp. Only for me to suddenly realise that light troops can't attack a fortified camp! On the left I would rather draw a veil over how badly my cavalry had performed.

Outcome

A defeat for the North African Arabs

Lessons Learnt

  • Light troops cannot attack fortified camps
  • Stan’s use of support for he's mainline was very effective.
  • My right wing needed some heavier troops then I had given them
  • It is always valuable to find new opponents to learn new lessons


ADLG - Game Report 17

Greeks(60) vs Early Achaemenid Persian(64)

The one lockdown project that I had yet to complete was rebasing my Early Achaemenid Persians. I am pleased to say that is now complete, or at least partially complete until I need more, and different, troops. These figures are somewhat old, nearly 40 years old in fact, most of them are Peter Laing figures. nonetheless they look quite good when they're all based up on the table.

This game was between myself and my friend Paul. Paul was down in Bournemouth on holiday with his family and he decided to take a break from them for an afternoon of wargaming with me at Entoyment. Paul has only played one game of ADLG, that had been with me via zoom. Therefore, to keep it simple I gave him the same troops as previously, the Greeks.

I placed a strong cavalry presence on the left wing and a lighter cavalry presence on the right wing with the Immortals and sparaba In the centre. I left behind two levy to guard the camp. Paul placed his cavalry on his right and two blocks of hoplites in the centre and left.

The army will advance. And when it advances and gets into range it will fire at the Greeks. Although to be candid the effect was minimal.

The bow armed Persian cavalry had slightly more luck with their bows against the Greek cavalry than the immortals. On the right the Greeks have got themselves into quite a good defensive position. 

My intention was to cause significant disorder amongst the Greeks through bow fire was not was not achieved. Once initial contact has been made I came off worse than the hoplites. Whereas my cavalry did much better. On the right I decided that discretion was the better part of valour and my cavalry evaded.

The Greeks have done well, destroying a large number of sparaba and one unit of immortals. While the Persian cavalry all but destroyed the Greek cavalry on the Greek right. On the Greek left their peltasts are continuing to hold their own against the light troops threatening them.

After breaking the Greek cavalry the Persians have attacked the Greeks in the rear and destroyed two units. 

The Greeks have broken through. They have laps around and attacked the immortals in the flank destroying another two immortal units. One of the immortals has destroyed a hoplite in retaliation.

Outcome 

A victory for the Persians, who lost 16 cohesion points compared to the 25 lost by the Greeks.

Lessons Learnt

  • Don't expect mixed units to stand for long against heavy troops
  • Never underestimate the benefits of attacking in the rear
  • The Persian cavalry pushed their luck somewhat!


ADLG - Game Report 16

Thebans (60) vs Spartans (60)

 The Greek Civil Wars are alive and well and present in Bournemouth. Well at least it is at Entoyment. Kevin and I met and decided to field Greek armies. This time I decided to field Theban’s rather than the Thessalians. Really went with his famous Spartans, would King Leonidas be alive at the end of this battle?

My plan, such as it was, what's the hold on the centre and right, and try to use my cavalry superiority to breakthrough on the left if at all possible. Knowing my previous plans, I have some doubts as to whether this would be successful!

So I move forward on the left with my lighter troops leaving the cavalry in reserve to breakthrough when the opportunity presented itself.

I was fully expecting to fight at the top of the hill but in the end Kevin hoplites advanced to meet me at the foot of the hill.

In the centre the massed ranks of levelled spears continued to move forward and give battle to each other.

On the left it has got rather messy. My left flank has crumbled, but the peltasts hold the ground. one of my hoplite units has managed to flank the enemy.

Before my flank attack was able to go in it was attacked from behind by some cunning Spartans. However, this didn't concern my hoplites who beat back the Spartans with great skill and determination. Meanwhile in the centre battle has been joined.

Fighting on the left flank is brutal. The Spartans are trying their best to outflank the peltasts. There is a great deal of disorder on both sides.

Once again, my much vaunted hoplites breakthrough the Spartans and we have the opportunity to roll up the Spartan line. The less said about Kevin's three consecutive 1s for command in one turn the better.

This battle was going down to the wire. Losses are heavy on both sides. On my left, the brave Peltasts have destroyed the hoplites and now, with the support of the cavalry, have the potential to defeat the Spartan right wing. In the centre I have lost a number of hoplites but the breakthrough on the left of the line has been successful and we are about to destroy another Spartan. On the bottom right picture you can see that Kevin has successfully destroyed my unfortified camp.

Outcome

Mutually Assured Destruction - a draw

Lessons Learnt

  • Keeping a Light Cavalry unit in reserve would have prevented my camp being overrun
  • You don't have to win to have a great fun challenging game.


ADLG - Game Report 181

Medieval Spanish (239) vs Order of St John (263) For the final battle of the competition I was facing Drakoulis’s noble Order of St John. A...