1798 Austrian German Line Regiments

These AB Austrian French Revolutionary War figures have been waiting for painting for 25 years. With the opportunity to field them under Bataille Empire meant that I had noe xcuse not to paint them and finish of the Army!


Onto the Hungarian Infantry Regiments, with their handsome blue trews.

ADLG - Game Report 7

Early Imperial Roman (84) vs German (90)

For the last match of the day I fought Paul's Germans. With his 28 units and my 21 I was going to have to destroy a lot of Germans to win! 
The Romans reorganised and brought 8 cohorts to the table, 2 auxilia and 2 bows, and 4 heavy cavalry and the usual light troops.
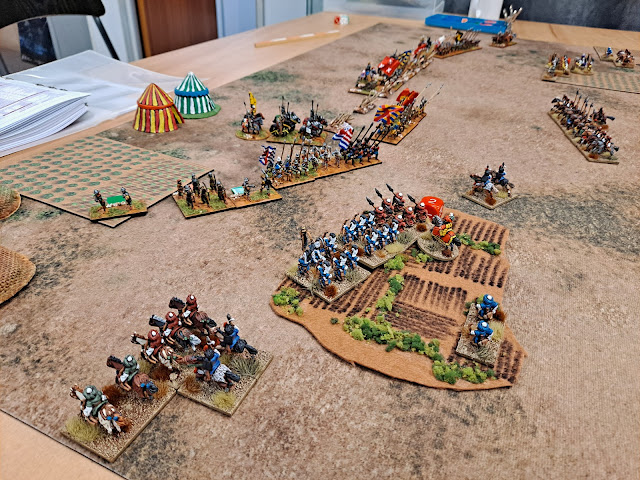
Light cavalry contact has been made on the right while the main Roman line moves to engage. The Auxillia fight a holding action in the plantation on the left.
The Moorish light cavalry win, excellent performance across all three battles; meritorious unit award me thinks.The right centre has engaged while the cavalry pursue the German cavalry after detaching units to support the right centre.
Although the Roman left flank has been broken, and the camp threatened (it didn't fall), the centre has defeated the German warbands extensively in the centre. Another meritorious unit goes to the Assyrian Bowman who despite 2 cohesion points defeated the warbands it was engaged against.

Result

A Roman victory, we just got over the line, and it might have been a game turn sooner if I wasn't as impetuous as the German warbands! The Germans hung around on 25 cohesion points lost out of 28 for about 3 turns!

Lessons Learnt

  • A reasonable force mix
  • The Bows under command of the Cavalry worked well (thank you Kevin)
  • A little more thought about which commands to activate first would not go amiss!

ADLG - Game Report 6

Early Imperial Roman (84) vs Huns (110)

I have had bad experiences fighting Huns in the past with WRG 6th Edition. It was going to be interesting to see if anything had changed with ADLG; spoiler alert - it hadn't. For this battle I dropped the artillery, fewer cavalry and more Auxilia.
I was hoping for some constructively difficult terrain for the Hun to navigate, as you can see the entrails from the chicken were against me on this one. Kevin's Huns are already maneuvering against my right flank where my weaker cavalry are outnumbered.
Romans advance to try to force the contact rather than be shot at range by the Huns. The cavalry fight on the right isn't going too well - who thought it would.
Some judicious charges have forced the Huns to evade which might slow them down with hopefully low command dice as they regroup. Meanwhile the warbands in the centre have finally been unleashed.
Minor success but the Huns are overwhelming the Roman Cavalry and Auxilia.

Result

A crushing victory for the Huns

Lessons Learnt

  • I need to go back to the drawing board and think about how an infantry army has a chance of fighting and winning against a mostly cavalry army. Edge to Edge infantry and walk the cavalry off the board?
  • Again Bows intermixed in the line wasn't effective; keep them to the flank, or the end of a line.

ADLG - Game Report 5

Early Imperial Roman (84) vs Graeco-Bactrian (46) (Rematch)

For the rematch with Paul's Graeco-Bactrian's I decided to mix things up and add two light ballista's. I also decided to maintain a reserve of 3 elite cohorts. As you can see the terrain was interesting, indicating we were fighting on the plains beneath the foothills! 
The Bactrian light cavalry are trying to move around my right flank.
My left flank was protected by two auxilia and two cohorts screened by slingers.
The light cavalry battle ended in a draw with each of us losing a unit. In the centre the Pikes are forming up on the hill.
The cohorts in the centre are moving to entice the pikes onto the plain.
The Romans blink first with the pressure on the left mounting they decide to rush the hill.

The Roman cavalry has been overwhelmed, despite the valiant efforts of the moorish light cavalry who defeated the enemy to their front despite being hit in the rear!

Result

The reserves have failed to engage before the Roman's suffer an inevitable defeat by losing both their right and left wings!

Lessons Learnt

  • Artillery can be effective, as it was in slowing the Cataphracts, but it needs to be positioned better.
  • Equally mixing the bows and the artillery along the line isn't a good tactic
  • If the enemy want to stay on the hill then let them, instead destroy their flank forces instead.

Rebasing Figures for ADLG

Adventures in rebasing for ADLG

I am currently rebasing my Hoplite army in 15mm for ADLG. The figures are old, but venerable, and deserve to fight again with a new set of rules. They are either Peter Laing or Irregular Miniatures. The spears were all pins, and some have broken off over the years. 

I went out to by some pins to replace the broken and missing ones, and I was about to consider making a start on the first unit when I caught this youtube video by Ross on making your own spears. 

Once I had watched this I rushed downstairs, seized the broom and had a try. Awesome success in my opinion! Before on the right after on the left. And yes, they are Peter Laing Figures for those that can remember them - waste not, want not.


Bataille Empire - Game Report 3

1809 Austrians vs French around Regensburg

Round two for Adam and myself. We decided not to leave it to long between games as we wanted to make sure that we remembered as much of the rules as we could. I don't think we did too bad at all. Overall more than a qualified success, we are both warming to the rules.

Initial Forces - 200 points

Adam's French were similar to the last orbat. This time, however, he decided to have less capable commanders which freed up the points for a Cuirassier Division of two regiments with an accompanying horse battery. The other two divisions were infantry.

My Austrians were similar to the previous game, except that I downrated the infantry to all conscripts. This gave me two infantry divisions, one with 4 regiments and a battery and the other with 6 regiments and a battery (68 points), The same advance guard division and the Dragoon Division. The difference in size between the infantry divisions was to ensure that if we had to fight an Assault battle again, then I would be able to leave the larger infantry division off table as the reserve given it was one third of the army!

Initial Setup


With the Austrian recon points (French Cuirassiers find all this recon nonsense beneath them) they won the initiative and became the attacker with an Attack battle. So all Austrian forces were at last on the board at the same time. Right from the start it was clear that the Austrian left and the French right were constrained by the large wood. The other point without doubt the central (gentle) hill was going to become a magnet for both sides with the cavalry doing their thing on the Austrian right flank.

Game Turn 1


As attacker the Austrians seized the hill; how long could they hold it? On the right the Austrian advance Guard Division moved to attack the building with their right flank secure by their Hussar Regiment and that of the Light Cavalry Division. The Hussar Regiment were charged by the Cuirassiers and were forced to Retreat. In response the Dragoons counter attacked and forced the Cuirassiers to Retreat, yes you indeed did read correctly! 


Game Turn 2


The Austrians change the orders of the Advance Guard to Engage, they lacked the strength to attack the Building objective. 

On the Austrian right flank both sides Cavalry continue to trade blows in charges and counter charges. Honours are broadly even again, but one can see the cuirassiers starting to gain an upper hand against the Austrian lighter cavalry.

In the centre the French attack on the hill has brought them into volley range. In the ensuing fire fights after sustaining more fire losses from the French an Austrian regiment withdraws, and a reserve regiment takes its place.

Game Turn 3

On the Austrian right the French Cuirassiers charged the Advance Guard infantry forcing the lead regiment to square, the other cuirassier regiment charged and destroyed both regiments of dragoons. 

In the centre the firefight has forced the Austrians of the hill. The furthest forward French regiment charged and forced the Austrians to Retreat, even though on its way into the assault it took significant fire casualties from opportunity fire. The Austrians in the centre only have two formed regiments, both to the right of the ditch.

At this stage the Austrians had lost around 28 cohesion points, 12 away from their rout level.


Game Turn 4

This game turn saw the Advance Guard divisions crumble under the French Infantry attack and their hussars eliminated by the Cuirassiers. With that we drew a line under the game, and awarded the French the vicorry based on the Austrian cohesion losses reaching 38 points and they held the hill objective. And Entoyment wanted to close!

Lessons Learnt

  • If both players have the rules with them certainly would help speed up the game :).
  • Leaving Austrians in attack column to defend isn't the best tactic as they lose their firepower.
  • Once again deployment and size of the forces means that one has to choose very carefully an initial deployment.
  • As an Austrian with limited command capability once you have deployed you are deployed; you are unlikely to have sufficient command points to respond flexibly.
  • Light and medium cavalry are like lambs to the slaughter against Cuirassiers; unless one really gets lucky with the combat dice.
  • The terrain was much better this time. It helps to have some large terrain elements and buildings that are the recommended sizes. 


ADLG - Game Report 4

New Kingdom Egyptians(14) vs Incas(274)

The very first time after painting these Egyptians some 25 years ago that they have been into battle, after rebasing for ADLG. Paul Frith's Incas may not be their natural enemies but it gave a surprisingly well-balanced and interesting game.

A better deployment from the Egyptian CinC; apart from failing to take due account of the gully I deployed!
From the Inca's viewpoint. The Egyptian encampment was scratchbuilt from the remnants of an old shirt!
The Inca CinC is carried into battle in his Beach Hut.
Meanwhile the Egyptian chariots advance to engage with fire.
A solid line of Egyptian Infantry with heavy infantry reserves to break through when needed
Colorful Incas
The left Inca refused echelon is under attack from the Egyptians. Multiple breakthroughs by impetuous Sherden warriors were made, but they couldn't be adequately exploited
A very close battle the Egyptians came within 3 cohesion points of defeating the Incas, but some good rallying in the last turn saved the Incas.

Result

A close run victory for the Incas

Lessons Learnt

  • Light Chariots are very effective in combat against Mediums or lighter troops.
  • If you are trying to breakthrough a line make sure that the commander has sufficient command points to commit the reserves and exploit any hole
  • Be more aware of how difficult ground can cramp cavalry deployment and combat capability

ADLG - Game Report 3

Feudal French(175) vs Hundred Year's War English(225)

The first outing for my French. I decided to employ them as their feudal mode rather than the later period. A whole host of French heavy metal.

The French heavy metal is all cramped up on the right flank. A rather chaotic deployment when the CinC can't tell is right from his left. However we have managed to force the English light cavalry back.
On the French left the infantry are holding a firm flank, although to be candid it is not clear what they are protecting against that is a significant threat.
The French heavy metal has finally made contact and broken through the English line.  
While the battle rages in the centre and the right the French infantry felt left out and decide to close to battle; not entirely successfully!

Result

A French defeat, but in retrospect despite the deployment fiasco could have gone the other way with a little more aggressive combat rolls!

Lessons Learnt

  • Make sure one deploys the corps needing the most space first.
  • Read up and understand what impeteous troops can and cannot do.
  • Think about buying some dismounted knights as an option.
  • Longbows are powerful, but once you make contact they are probably toast


ADLG - Game Report 2

Early Imperial Roman (84) vs Graeco-Bactrian (46)

This time the Romans are brought to the table. They have already won one, lost one; what could they do this time? A little bit of intel analysis on the Graeco-Bactrians fielded by Paul Frith led me to the view that I might need more cavalry than normal, which I loaded onto my left and open wing.

Deployed for battle. Cohorts in the centre. Auxilia and Lights in the difficult terrain to the right and Cavalry to the left.
View from the right flank
Now how exactly does one deal with elephants? One eats them a bite at a time - or at least one tries to.
Cavalry have contacted on the left flank - no subtlety here! Whilst the centre left cohorts refuse their flank.

After this the contact became general across the entire front. Casualties were significant!

Result

An honourable if bloody draw with both sides reaching their rout level in the same game-turn!

Lessons Learnt

  • A reasonable force mix; the Romans can often benefit from more than the normal cavalry and fewer cohorts
  • However, I would have welcomed some lighter troops to flank the elephants
  • Take pictures at the end of the battle!

Bataille Empire - Game Report 2

1809 Austrians vs French in the Danube valley

Last night Adam Worsdale and I fought our first game of Bataille Empire. A qualified success for both of us. There was a lot of reading and re-reading the rules. As should be expected the first time out with figures on the table. One can read the rules as much as one like, but it is not till the metal hits the table and you roll the bones that one can really appreciate what the rules are driving at and enabling. 

Initial Forces - 200pts

Adam's French engaged with 3 Divisions; two of infantry and a small light cavalry division with a grand battery of two 8lb batterys. All commanded by a brilliant commander (Marshal Lannes).

For my Austrians, were five divisions; two of infantry, a mixed vanguard division and a light cav division of dragoons. All my commanders were ordinary or poor.

Initial Setup


The first challenge is terrain choice. The entire Austrian right and French left flank was devoid of all terrain - perhaps the river flood plain leading down to the Danube? 

The second challenge that the French were attacking, not only that they were assaulting. This meant that 1/3 of the Austrian forces were off table; the Vanguard Division and the Light Cavalry Division. None of which could be expected until Game Turn 4.

The Austrian's decided to concentrate and defend the two key objectives in depth. The French plan was to hold on their right and force a decision on the centre and supported with their cavalry on the right.

Game Turn 1


The initial artillery fire went in favour of the Austrians as the French advanced to contact.

Game Turn 2

The French Division on the right attempted to change its orders to hold, but the order didn't get through.

In the centre the Austrian artillery caused heavy damage on the centre French regiments. A

t the same time the forward right Austrian regiment decided to try and form square to defend against the Cavalry threatening its flank. It failed  and was subject to an opportunity charge by the Austrian Cavalry. The cavalry destroyed the Regiment and then rolled over and destroyed the Austrian guns before withdrawing. 

The Austrian left forward regiment retreated under fire, while the rear regiment successfully formed square and moved to defend the rear flank of the position from the Austrian Cavalry.

Game Turn 3

The French continued their attack in the centre. Their centre left regiment attacked over the hill into the flank of the Austrian 12lb Battery, destroyed this and pursued into the Austrian square and destroyed that. Their centre right forward regiment moved forward and had a firefight with the Austrian regiment facing them. Both held their grounds.

Now the second French Chasseurs a Cheval regiment attacked in flank the rearmost disordered Austrian regiment. This was destroyed and then pursued into the rear of the forward Austrian regiment destroying that.

At the end of Game Turn 3 the Austrian was 3 cohesion points from a crushing defeat, before their reserves had even arrived! With the terrain objectives firmly in the hands of the French we declared them the victors.

Rather than withdrawing the Chasseurs after their romp through the Austrian regiments, they decided to loiter for more victims.

Lessons Learnt

  • The rules give an impressively Napoleonic feel to the game.
  • Despite the time spent re-reading the rules as we played we judged it a qualified success; more games are definitely required.
  • Force selection is important, specially if one might be faced with the prospect of defending an enemy assault.
  • I believe that the terrain options need more feel for the different regions in Western Europe. The Danube Valley around Regensburg, is very different from Brussels, which is again very different from around Vienna!
  • Defending an assault is difficult. The CinC needs to have more of a reserve than a battery and needs to strip regiments from the Divisions to provide him with one!
  • I am sure other lessons learnt will occur to me!


ADLG - Game Report 1

 Low Countries (232) vs Ottoman Turks (247)

Third game of ADLG and the first outing for the Flemish Army. A little bit of research on the the Turks, commanded by Paul Frith, suggested I need some additional firepower so I scratch built some Organ guns. In the end they were quite useful.

The massed spears of Flanders ready for the Turks.

Turkish light cavalry ready to try and roll around my flank.

The handgunners have withdrawn out of the fields.

The Flemish probe out beyond their fortifications - in hindsight not a good move; even if we both managed to make a mistake on when and how fortifications are deployed!

While the Flemish knights pursue the Turkish light cavalry they are oblivious to the fact that their camp has been overrun!

And to reciprocate the Flemish knights on the right flank failed to overrun the Turkish Camp! They were beaten back by a bunch of levies.

Result

A defeat for the Flemish

Lessons Learnt

  • Remember to deploy the fortifications correctly if I choose them
  • Organ guns were worth the effort, even if the dice rolling wasn't the best
  • If you have fortifications it isn't best to leave them.
  • If your camp isn't fortified then try and protect it!


ADLG - Game Report 181

Medieval Spanish (239) vs Order of St John (263) For the final battle of the competition I was facing Drakoulis’s noble Order of St John. A...